| S. Andrew B. wrote: |
| Thank you Ian, this is super helpful. Am I right in assuming that you padded the gores before attaching them to the sleeve, then did the quilting stitches after they were attached? That seems the best way to make all the quilting stitching line up. I'm wanting to do the quilting stitches vertically on mine, but the way the shoulder flairs out into a circle is making my brain hurt a bit trying to figure out how I'd do that without it looking like a Spider-man costume. A normal pattern with a normal sleeve would be no problem, but I definitely like the unencumbered range of motion this pattern provides.
P.S. your finishing stitches look really good. |
So i built my hand-finished one very differently from the way I built the first one. I built the first one just like the directions say to. Since having done that garment I've done a lot of sewing so I'm much more comfortable with fitting and technique now and made several modifications, both in fit and the way I put it together.
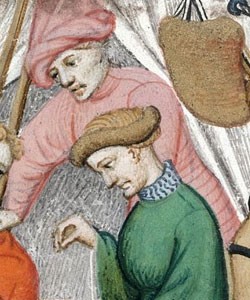
On the new one what I did was cut out all my pieces from the shell, liner, and batting first. Then I built the entire garment shell on a sewing machine. Then I laid the batting inside the shell, one section at a time (layers depended on where it was on the garment, 4 layers of batting being the highest I chose to use in any section). Then I placed the lining over the padding on that section. Then I whipped the unfinished edges of the shell down to secure the lining in place, sandwiching the padding in between and rolling the raw edge under. This was done for ever section of the garment one at a time. If you cut the batting very closely to the shape of the section it's going in it shouldn't shift much before you have a chance to quilt it, but if you're worried you can baste it in place or throw down some temporary padding stitches to keep the batting from shifting inside the garment while you do everything else. Then once all the seams were finished I quilted the whole garment at once. If I were to do it again, I would probably quilt the sleeves before attaching them because that was kind of a pain. Then I hemmed the cuffs and bottom hem, and finished the neckline. After all that was done I did the front closure lacing holes and arming point lacing holes with a heavy waxed linen thread.
______________________________________________________________
A normal armhole will be much easier to wrangle than a multi-gored grand-assiette sleeve but the mobility is worth it in my opinion, and if you plan to suspend a leg harness from the garment, I would amend that to say it is a necessity. If you don't plan to hang leg armor from your garment you may not need to worry about a grand-assiette style sleeves. If you think that is a possibility though, consider that with a conventional armhole you will have a very hard time lifting your arms above your shoulder without either trying to lift your entire arm harness at the same time (and consequently right into your groin), or even worse you just won't be able to lift them above your shoulders at all. If you plan to use an alternate method of suspending leg armor then you could get away with less mobile armholes.
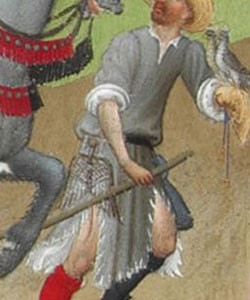
This is how the original c1364 sleeve was pieced together, but Tasha's pattern is a little bit simplified. You can see where the deep inset circular armhole comes from:
[ Linked Image ]