Go to page Previous  1, 2, 3, 4, 5, 6 ... 12, 13, 14  Next

Vincent Le Chevalier wrote:
I tend to consider that weight is not that important for handling but within certain limits of what your body can do. At 2X or 3X the weight of a "normal" sword you are indeed aiming high ;)


Well I'm hoping that it will be a lot closer to 2X than 3X: It all depends on how much material will be taken off with hollow grinding and the deep fuller as well as the distal taper.

Within reason, handling is more critical than just the total weight: Moving the POB an inch or two either way should have more impact on handling than an increase or decrease of weight as long as we are not talking multiple pounds.

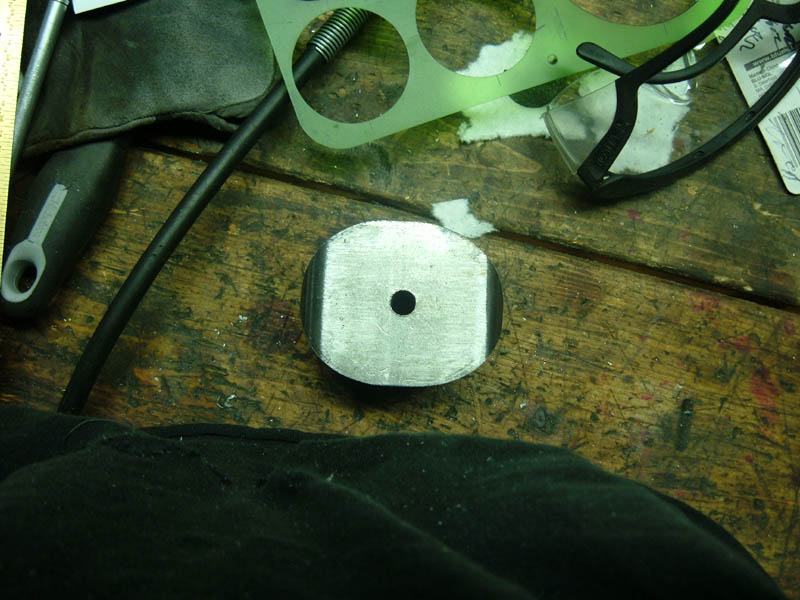
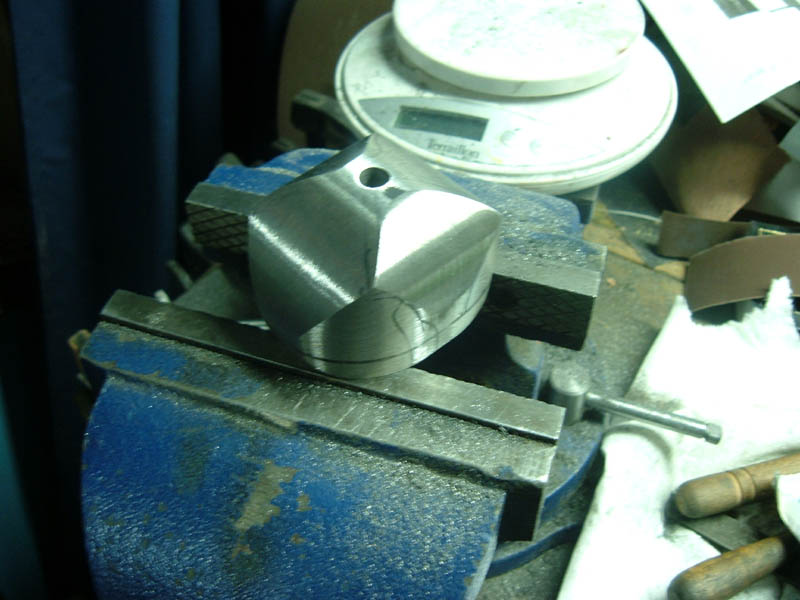
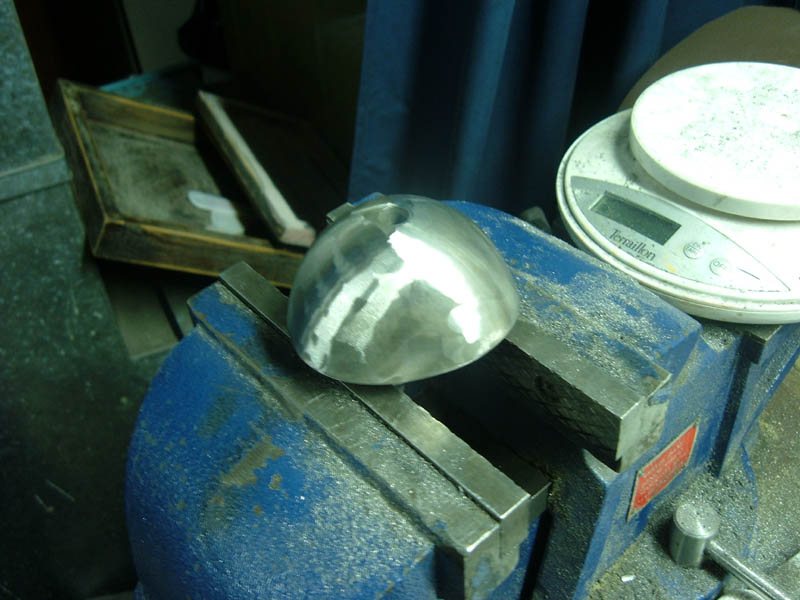
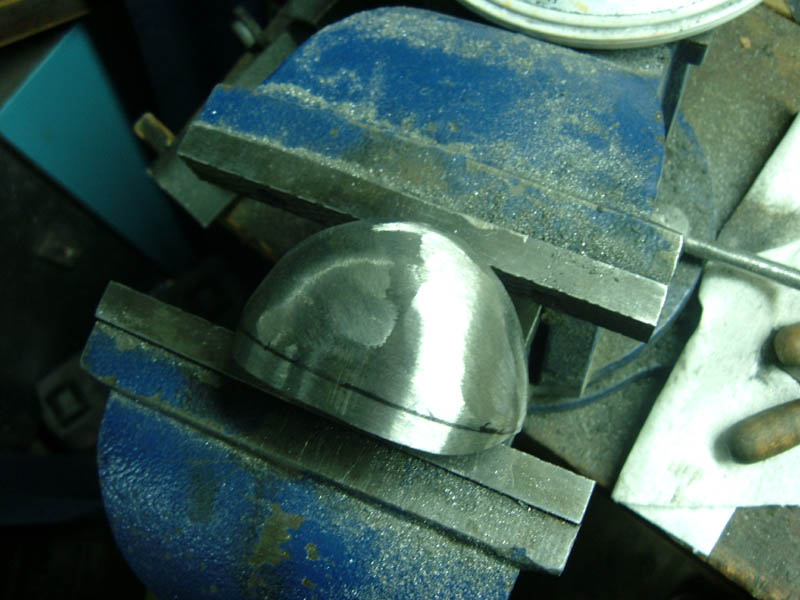
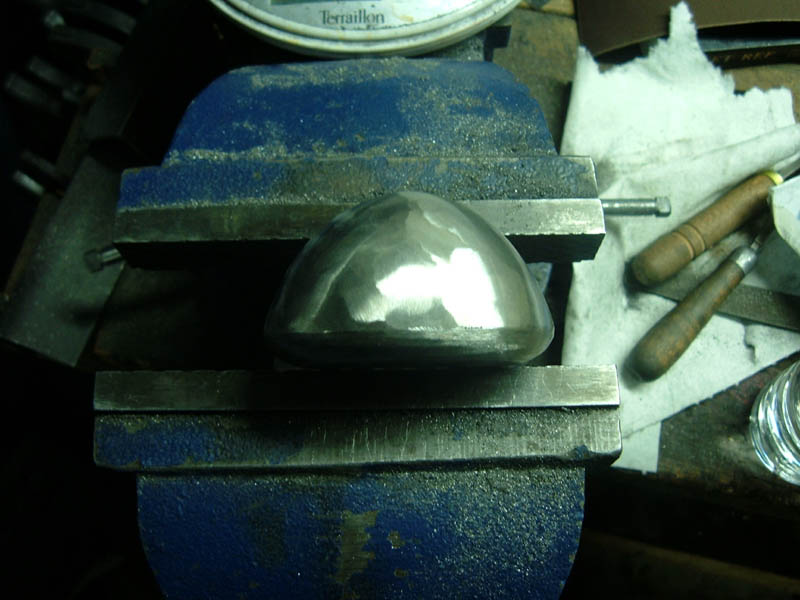
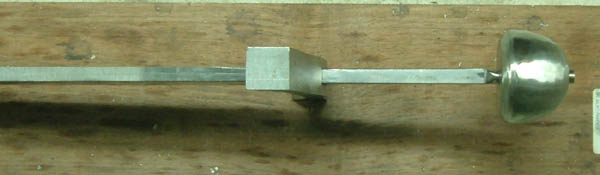
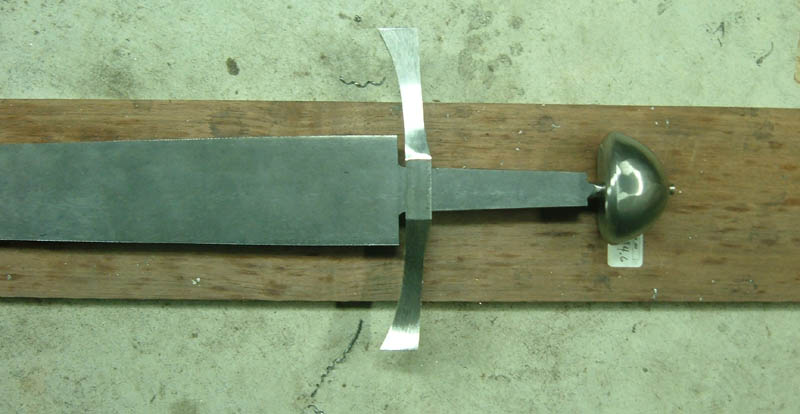
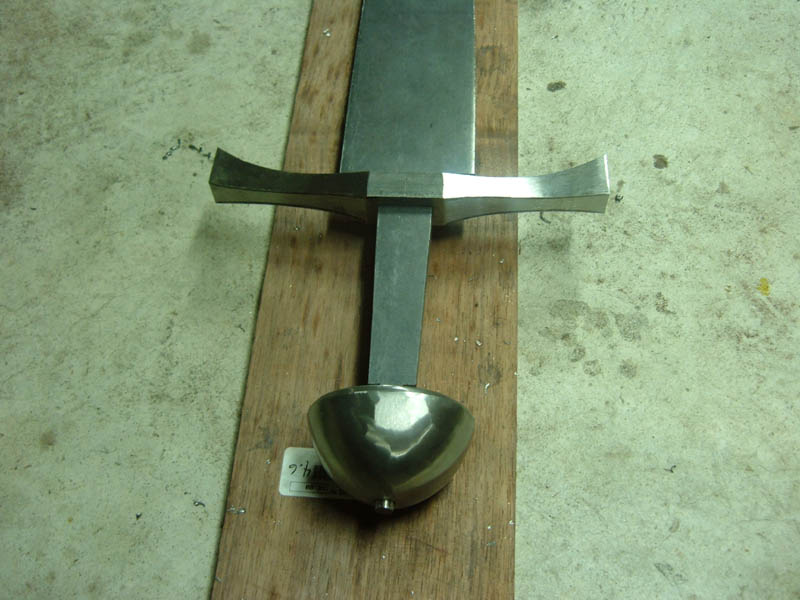
The profiled pommel stock is thick enough and I assume heavy enough that Mark should have enough there that the fatness or thinness of the pommel ( Total mass ) will give some range to make adjustment as well.

It's just that at the early stages it looks REAL heavy. ;) :lol: I have a lot of confidence that Mark will be able to get as close to good handling as is possible with the design he has to deal with.

( I might still want an extra 20 pounds of muscle though. ;) :lol: )
You're absolutely right Jean. The stock for the pommel thickness was chosen to make sure there was plenty of material to work with.

The next step was to give the pommel a rough shape to have some idea of what I'm dealing with with weight and mass distribution. This is to say that the pommel is not necessarily the exact size or shape it will be when the sword is finished. Offhand, I'm thinking that it will be quite a bit thinner, given it's weight at the moment.

So here were the steps on the shaping:

The sides were ground down to give the pommel it's round shape. Since it may not be the exact size, I made it a round as possible, using the entire thickness of the stock, leaving as much material as I could.

With the base being round, the faces needed to be taken it to give is some roundness as well, again leaving plenty of material to work with.

Here's is where it gets difficult to put across, taking an angular form, and making it round. The only was I can think of to describe it is by carrying the curve. The profile of the pommel has the curve I wanted to bring across to the front. It's a matter of mimicking the curve from the side all of the way to the front. I find it's always best to work to work one corner at a time, rather than an entire side. That could just be me though.

Then, it's marking out the lower portion of the pommel and putting that curve in.

And there you have it, a rough shaped pommel.


 Attachment: 88.98 KB
12.jpg


 Attachment: 83.34 KB
13.jpg


 Attachment: 72.03 KB
14.jpg


 Attachment: 79.08 KB
15.jpg


 Attachment: 76.98 KB
16.jpg


 Attachment: 71.33 KB
17.jpg


 Attachment: 20.3 KB
18.jpg

Mark G. wrote:
... And there you have it, a rough shaped pommel.

:cool: I love this stuff, Mark :cool: . The more of this you can show us, the better (as long as it doesn't interfere with your work, that is!).
This is great! It is so cool to watch this sword develope! Now if I can just convince OlliN to ship the finished sword to Maine....on second thought, with Jean doing one handed curl sets with 80lbs, maybe I'll pass on that idea :)
Allen Andrews wrote:
This is great! It is so cool to watch this sword develops! Now if I can just convince OlliN to ship the finished sword to Maine .... on second thought, with Jean doing one handed curl sets with 80lbs, maybe I'll pass on that idea :)


Oh, hammer curls and those are a LOT easier that the regular ones were I top off at around 35 to 40 pounds.

For some odd reason I can do 50 pound concentration curls seated with my elbow on the inside of my knee and that is supposed to be harder ??? Well everyone is different and one gets better at what they practice.

Now back to the sword: Mark that pommel looks great and I understand fully that it might go on a diet and loose weight when you are sure you can afford to reduce it more.

I don't have too much trouble visualizing how one 3D shape can be whittled down to a different 3D shape but the way to get there can be very different depending on preferences in how to go about it and what materials are involved: Clay, steel, stone, wood etc .... might influence greatly the getting from here to there. ;) :D

It's very exciting seeing the step by step process: I almost feel like I'm there. :lol: On the other hand I'm not there to ask questions or nudge your elbow at the wrong time. ;) :D
This post has been very fun to watch. Watching the pommel on this beast take form is sooooo cool. Thanks to Jean and Mark for sharing this! I hope we get to see the same sort of progress shots during the blade grinding. That should be very cool given the complexity of the grind on this one. Great stuff!
So, a little shaping of the guard is in order. It's not as complex of a shape or process as the pommel was, so there isn't a whole lot to go over.

The lines were marked out on the guard to give it a shape similar to that which Jean had given me a drawing of.

Like with the pommel, the point is more about getting some base information about the fitting and how it affects/reacts to the blade and it's characteristics. Now that I have some information about the hilt components, I can start in on shaping the blade.

Wish me luck. I have a feeling tomorrow will feel like a very long day.

Mark


 Attachment: 83 KB
19.jpg


 Attachment: 52.68 KB
20.jpg


 Attachment: 77.14 KB
21.jpg

" -What is best in life ?

- To crush your ennemies, see them driven before you, and hear the lamentation of their women !"

Guys, a real barbarian sword is forming right before our eyes !

I'm curious to see the grounding of the fullers...
The guard is also looking good. :D Just giving some feedback that everything is matching my design and expectations. :cool:

Mark: Make sure to take a few breaks grinding the blade as there is no point rushing things and then not being able to move your arms for 3 days after as you recover. ;) ( Sore muscles leading to shaky grip leading to wavy bevels. :p :lol: )

In any case look at it as a marathon and not a sprint and things are progressing really fast as far as I'm concerned. :cool:

Oh, I'm SO HAPPY that this is my project and will be MY sword. ;) :lol: ( And like I said before I'm O.K. with it if someone wants the same design excluding the style of the engraving / inlays. Also if someone wanted to scale it down to 2/3 the size while keeping the aesthetics that would also be an option to think about. Might even come in at a slightly lower price ? )
Believe me, I won't be rushing anything. That wouldn't be fair for anybody. I certainly have no interest in risking an injury. There was one over-working injury I had a number of years ago which resulted in not being able to use my arm for about a month. It was a good four or five months before I got full use of the arm back. It was not a fun time for me. If nothing else, the experience taught me to listen to my body more.
The grinding yesterday went well. I am sure feeling it today though. so I think I'll treat myself to break today.


First, I would like to introduce you to the grinder. I call it "The Grinder". She's a little dirty, but runs well enough.

WIth the blade marked out, I started in on grinding the distal taper. It's slow going at the moment, but it should gain momentum as the weight comes down a bit.

To give an idea of scale, I'm about 6'3", so this is quite a sizeable blade to maneuver.


 Attachment: 70.63 KB
22.jpg


 Attachment: 79.94 KB
23.jpg

Mark and Jean, That is turning into a fine looking sword. It is of particular interest to see all that is going into the crafting of this sword. I know it makes me more appreciative of the time and expertise that goes into the creation of an item that is made by hand. Yes machines and tools are used, but a craftman has to control those tools and make them do what he wants. Keep the updates coming.

Scott
Oh, I see a couple of other unfinished swords in the background that look interesting. :cool: :D

So you don't have a special name for " The Grinder " Time for a name the grinder contest. :p :lol:

Interesting that the first thing is doing the distal taper: Sort of makes sense as doing it as the bevels are ground would make the process complicated and it does get rid of a lot of weight ( I would hope ) making control while doing the hollow grinding and fuller a bit easier?

Grinder names:

1) The Abrasive Mistress.
2) Sparky.
3) Steel Eater
4) Betty ( Or any female name you like )

5) Anybody else have suggestions ? Lord of the Rings sounding names maybe: Elvish, Orcish or Hobbity. :p :lol:
Jean Thibodeau wrote:
Oh, I see a couple of other unfinished swords in the background that look interesting. :cool: :D


The one with the faceted pommel is especially eye-catching, please post a photo when you're finished with it! I'm amazed that you've got (at least) three custom swords under construction at the same time, that's quite a workload.
Keep up the good work, after this thread, I'm quite certain you'll have more coming your way shortly.
Well, grinding a distal taper first is the way that I go about shaping the blades. It is not the only time it gets addressed though. You're right in that putting it in after the bevels, fullers, etc. would make it a little more complicated. The main goal at the moment is getting the weight down, and giving it a basic shape before the fullers and bevels get put in. After that, the blade's characteristics will be more defined and then the process is more about fine tuning everything.

If you feel like trying to find the name to The Grinder, be my guest. I'm sure we can come up with prize for that. It will be difficult to figure out a proper name though. It should be something that is almost fragile and delicate to go along with the control that is necessary in doing complex hollows, but it should also have a bit of power and ferocity, showing that it is more than willing to bite you and take off chunks of skin. That's happened more than a few times.... Do try to stay away from Lord of the Rings names though.

I'm quite excited about the facet pommeled sword in the background. I can't wait to see how that one turns out myself. Yeah, there are a bunch of projects I'm working on at the moment. There is one saber blade that I'm working on finishing up that is going to be fantastic. I am actually only making a different blade for pre-existing hilt and doing the assembly, but it should be quite a piece when it's all done.

Mark
Mark G. wrote:
... I'm quite excited about the facet pommeled sword in the background. I can't wait to see how that one turns out myself. ...

I find facted pommels like that very attractive, myself, so I am also interested in seeing how that sword turns out.

Quote:
... Yeah, there are a bunch of projects I'm working on at the moment. ....

It occured to me, when I saw the other swords, that production might be a bit smoother if you can take several swords through the same steps together? Do you find that to be the case, or not? Of course, taking a cue from your earlier comment, if the grinding operation requires a lot of physical force, it might be easier to take a break between grinding steps. What is your preference?
I guess it's a yes and no type of answer. For this kind of production, taking several projects through the same stages doesn't save all that much time or make things run smoother, as compared to working on one piece and doing something else on another. Each piece requires as much time and attention as the next. It's more of a matter of how much of one process I can put my body through in a given day. It's usually a good idea to have pieces in various stages that require different types of work. It gives certain parts of your body rest as you work on other things.

Grinding is physically exhaustive, but it usually isn't that bad. I can go for days on end doing it. This project is somewhat of an exception at the moment. It's just a matter of time though. I'll get used to it.

Mark
And the winner for the OlliN Weight Contest is...

Allen Andrews with the guess of 8 lbs 7oz. Congratulations Allen! The actual weight of the profiled steel blade was 10 lbs even!!! Easy the biggest blade we've worked. Because we had such a great response to the contest and we did have someone come really close to guessing the weight (but was over the actual amount) we will be giving a way a runner up prize to Kirk Spencer for his guess of 10 lbs 6oz. We'll be contacting the winners shortly about their prizes.

Thanks very much for all those that participated!

Best,

Matt
I'm shocked by that weight! I guess this means you'll be reducing it by 60% or more with final grinding, fullers, etc? Wow!! That's pretty awesome.
Nathan Robinson wrote:
I'm shocked by that weight! I guess this means you'll be reducing it by 60% or more with final grinding, fullers, etc? Wow!! That's pretty awesome.


Well, it seems that the target weight of 5 pounds should be possible and maybe even lighter ? Oh, lets not forget the weight of the completed hilt: So maybe 4 pounds for the blade alone?

My guess for the profiled blade was 12 pounds by the way as I was being pessimistic about what the final weight of the sword might be.

Taking away 50% to 60% with all the bevels seem plausible to me: Take a simple rectangular bar and turn it into a flat ground diamond shape, or just on paper draw a rectangle and inside the rectangle draw a diamond shape, everything outside the diamond being removed I would think that the remaining surface area in square inches should be half of the surface area of the rectangle. If you remove even more with concave surfaces and a fuller type bite on each side you would lose even more material.

I just drew a rectangle on a piece of paper and if I used strait lines I get 4 triangular shapes outside the diamond shape and the diamond shape divides into 4 triangle identical to the removed triangles: So it would seem that 50% lost of surface area would be equal to 50% loss of volume / weight in 3D.

Just a Highschool geometry problem I guess. ;) ( But that was a long time ago. :lol: )

Oh, add to that some more material taken away with the distal taper and the problem might be keeping the sword heavy enough. :p :lol: Well, unless my math is completely off.

Maybe, Mark or other sword makers could give us what is the weight of a typical sword rectangular blank before and after being finished: I assume that different blade type would give different values but the range of weight removal would be at some predictable range ? I would guess 35% to 65 % depending on the sword being lenticular, hollow ground or flat ground.
Go to page Previous  1, 2, 3, 4, 5, 6 ... 12, 13, 14  Next

Page 5 of 14

Jump to:  
You cannot post new topics in this forum
You cannot reply to topics in this forum
You cannot edit your posts in this forum
You cannot delete your posts in this forum
You cannot vote in polls in this forum
You cannot attach files in this forum
You can download files in this forum


All contents © Copyright 2003-2006 myArmoury.com — All rights reserved
Discussion forums powered by phpBB © The phpBB Group
Switch to the Full-featured Version of the forum