Go to page Previous  1, 2, 3  Next

Carving the Pommel Top

I wanted a design carved on the top of the pommel to offset the carving around the perimeter. This would also highlight the polished wood between the carvings on the side of the pommel. There is an original ivory Mindelheim pommel with a beautiful starburst pattern around the peen block on the top of the pommel. The starburst pattern is made as a negative design using amber triangles inlayed around the edges of the pommel top. I wanted to reproduce this design in amber... but after a few weeks of contemplating the cost and effort involved, I settled for carvings again.

ks


 Attachment: 97.5 KB
69.HaC1b.730-660.TypMindelheim.Iron.IvoryPommelAmberInlay.HallstattAustriaSalzbergCem.G507.720bc.MNHV.TOMB.jpg


 Attachment: 140.83 KB
70.pommelTopDesign.jpg

Putting in the Peen Block
One of the distinctive elements of many Mindelheim swords was a rod extension (pommel spike) that extended through the pommel and was peened over a peen block at the top of the pommel. I wanted this feature, but did not want the headache of making sure everything aligned perfectly inside the pommel. So I cheated again :) :D ;) Everything on the surface looks as if the pommel spike extends through the pommel. It does extend about halfway. I cut off half the pommel spike to create a faux peening on the peen block. The tip I cut off the end of the pommel spike was annealed by heating it in a torch and dropping it in water.

I made the disc-shaped peen block from a different color piece of bronze I cut off the hilt of an MRL sword (one day this sword might become a Spartan xiphos). The annealed tip of the pommel spike was then peened into a hole drilled in the center of the peen block. One of the Mindelheim finds has a peen block with a swirl pattern along the edges. This feature also appears on the peen block of my Mindelheim. Using my drill press I drilled a hole in the top of the pommel to receive the peen block and faux peening. Once the hole was shaped to receive the peen block, it was epoxied into place.

ks


 Attachment: 136.03 KB
75.PeenBlockBronze.jpg


 Attachment: 141.8 KB
78.HoleInPeenBlock.jpg


 Attachment: 145.68 KB
80.PeenBlockPeened.jpg


 Attachment: 144.51 KB
84.SeatingPeenBlock.jpg


 Attachment: 144.23 KB
85..Peen-Block-Close.jpg


 Attachment: 97.91 KB
85.HaC1b.730-660.TypMindelheim.L85.HallstattAustria.SalzbergGr126.NaturhistorischesMuseumWienVienna.TOMBA.jpg

Faux Rivet Heads
Earlier I spoke of the steel pins that were epoxied through the grip and tang to add the cross binding of a rivet. I sanded off the epoxy at the surface and drilled shallow holes in these locations to receive thick bronze wire that would function as faux rivet heads. I also drilled shallow holes on the opposite sides where the rivets would exit the other grip scale. The wire was cut in a very short section and glued into the holes. After the glue set, using a cutoff wheel on my dremmel tool, the tops of the faux rivet heads were ground down flush with the wood of the grip. I did this a little at a time, moving from one rivet head to the other, to keep the heat from building up and burning the glue and wood.

ks


 Attachment: 139.9 KB
86.FinishingNailPinHoles.jpg


 Attachment: 134.11 KB
87.BronzeTipsIn.jpg

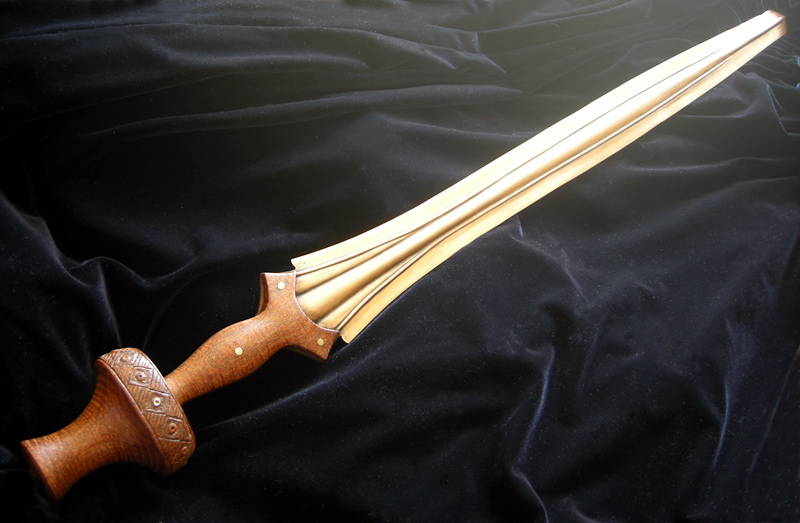
Attaching the Pommel
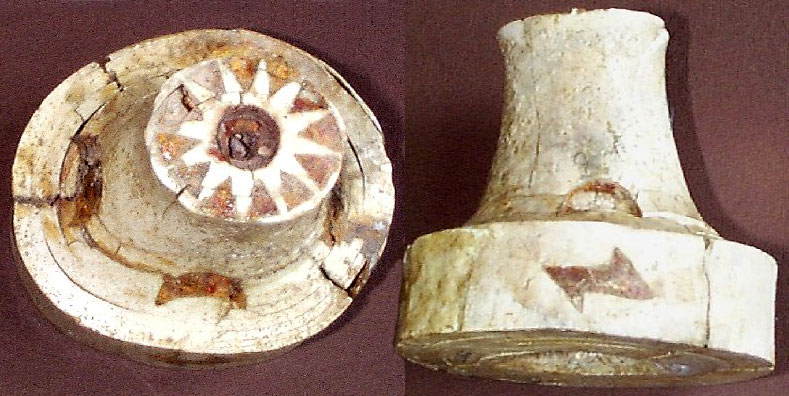
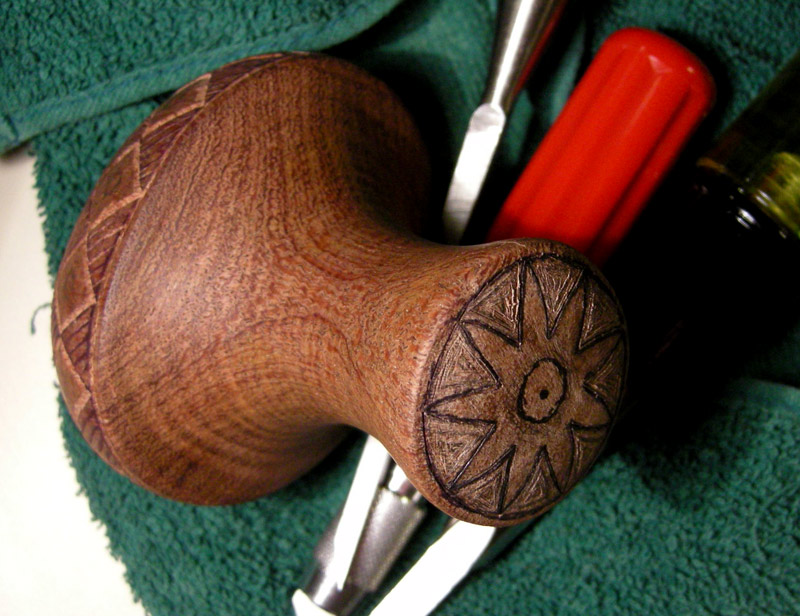
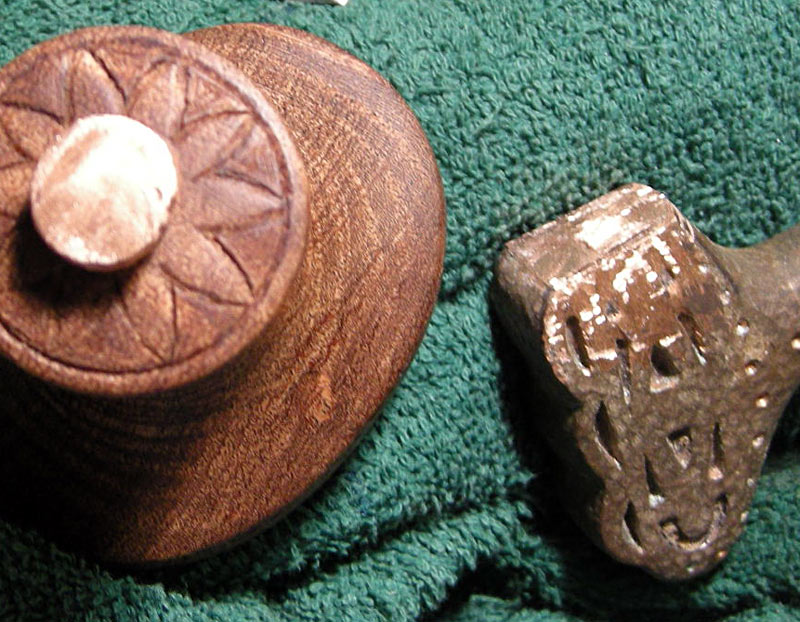
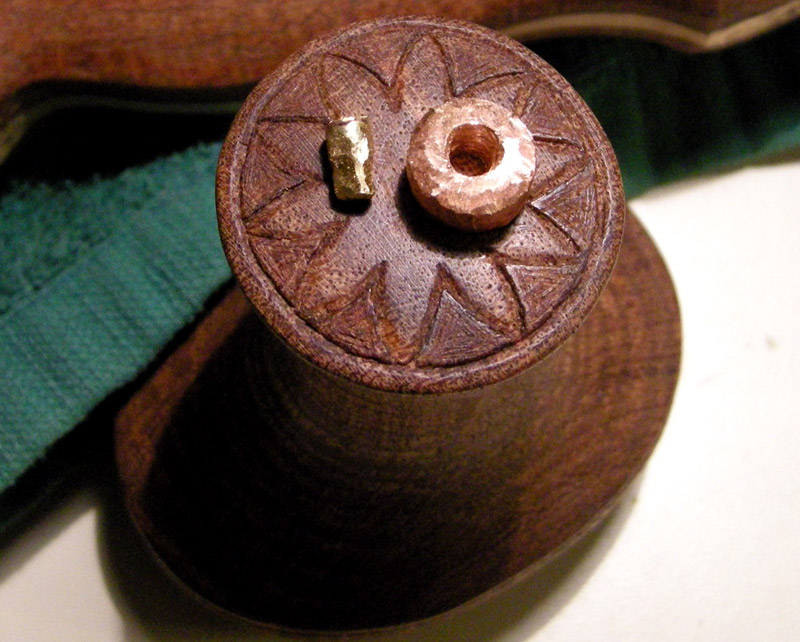
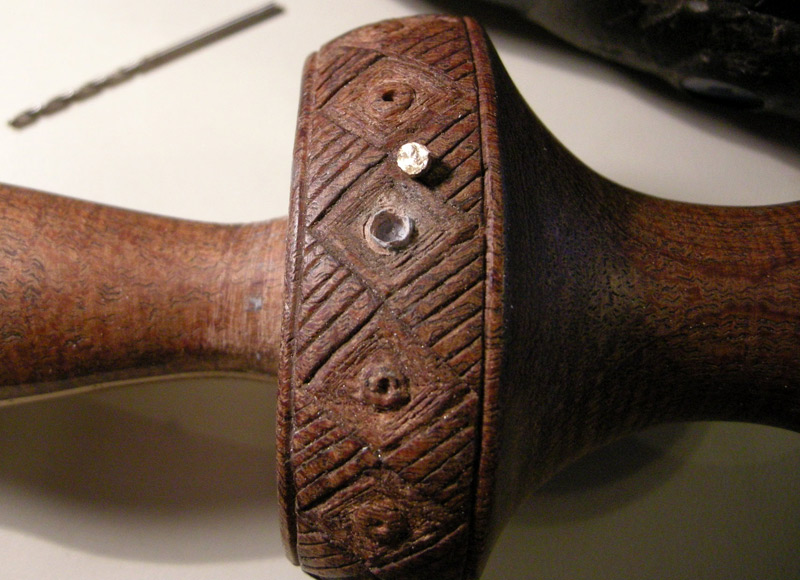
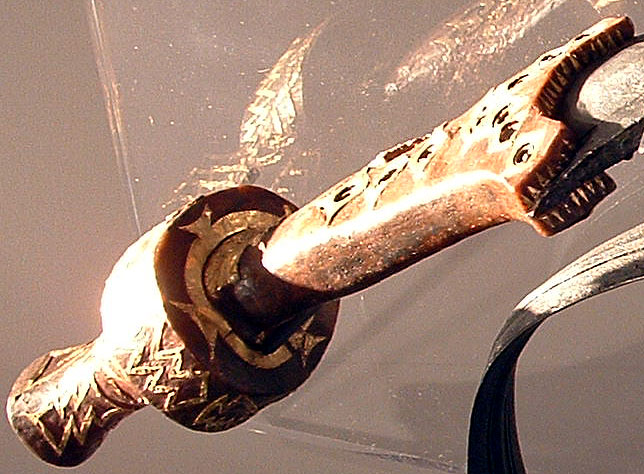
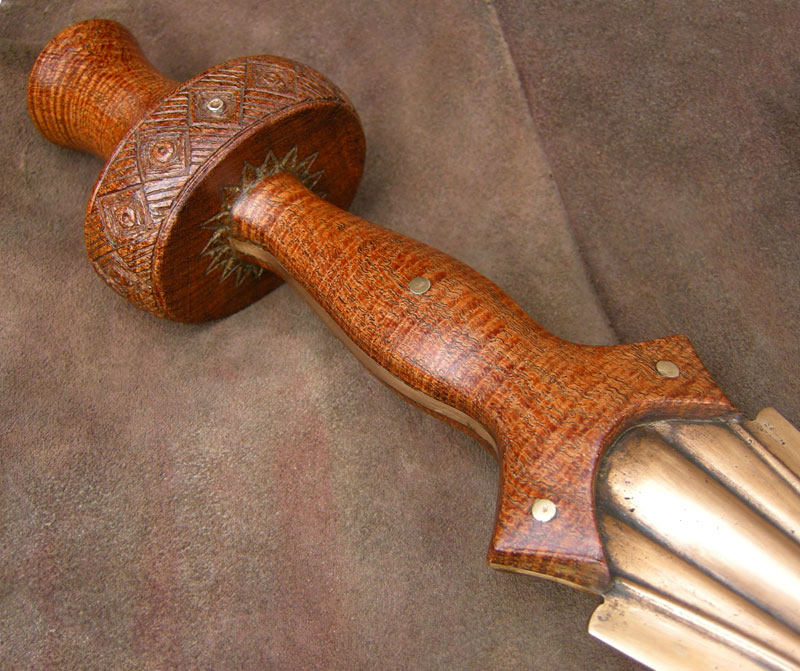
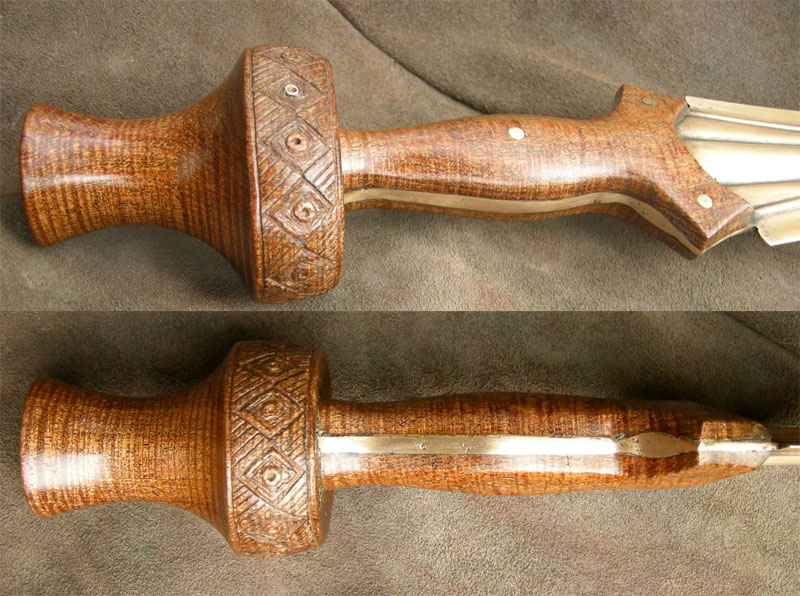
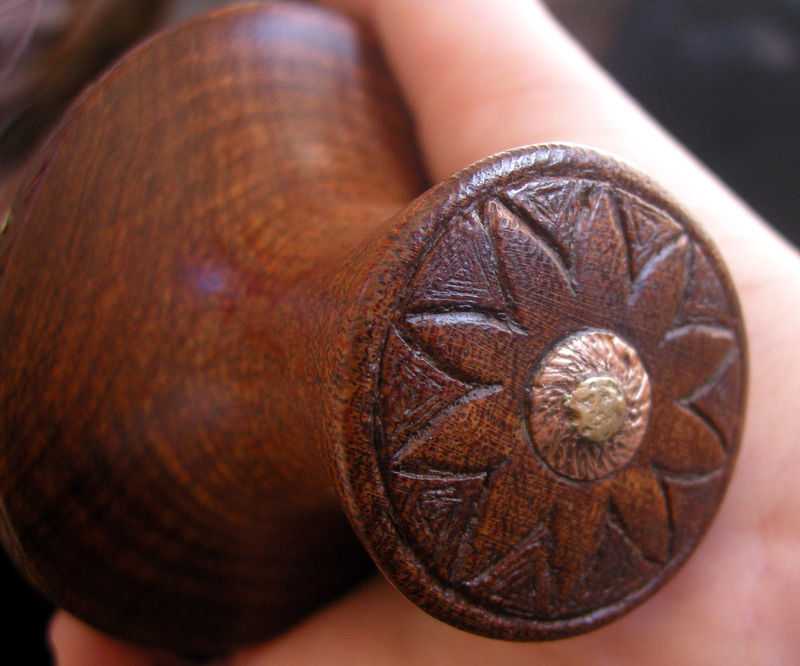
Attaching the pommel turned out to be more trouble than I thought it would be. Actually I made it harder than it should have been. After I made sure that the end of the grip, the pommel tang, fit snugly into the hole cut into the bottom of the pommel, I noticed that the figure on the pommel was a better matched for the figure on the other side of the grip… :\ :mad: So… I needed to turn the pommel around. And as might be expected the fit was no longer nice and snug. So… 
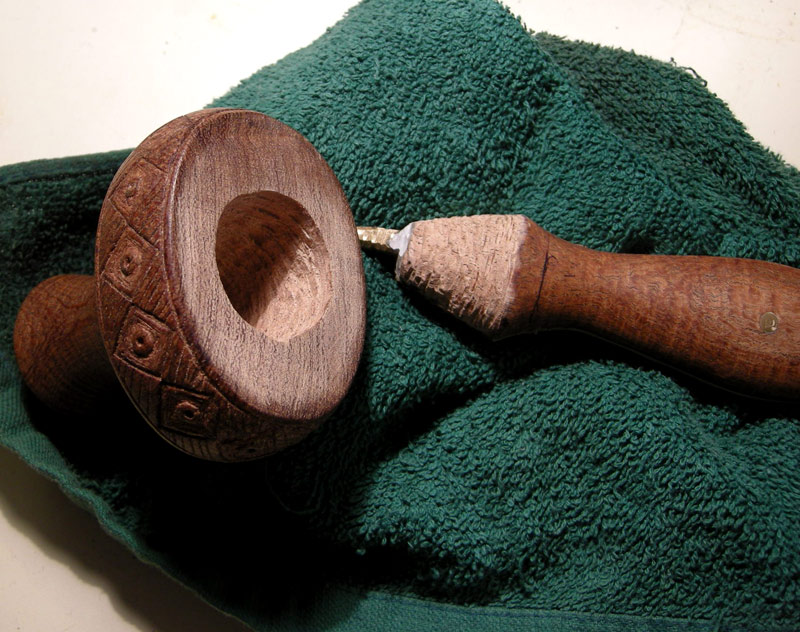
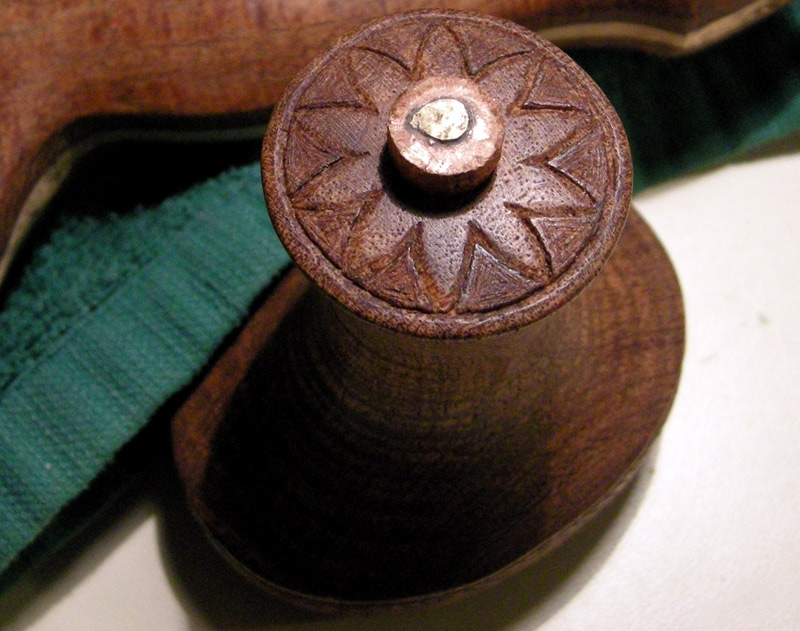
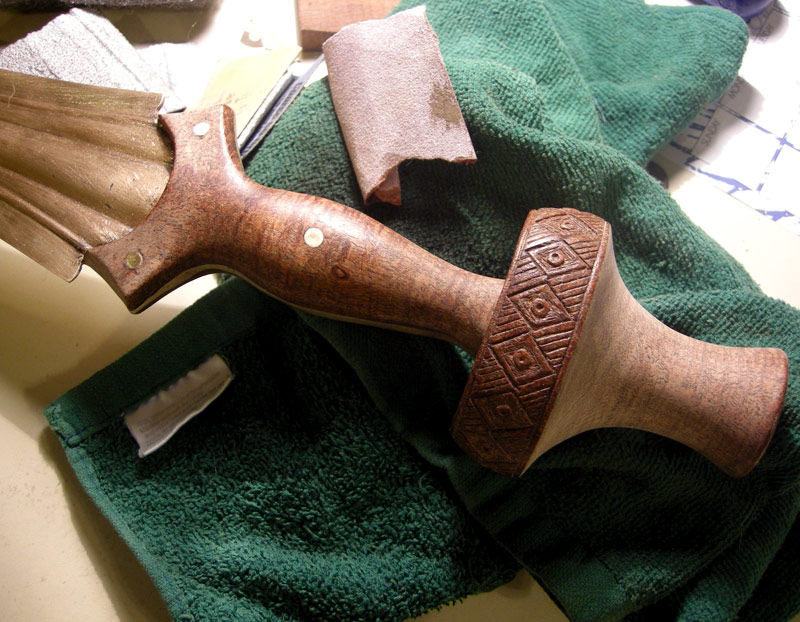
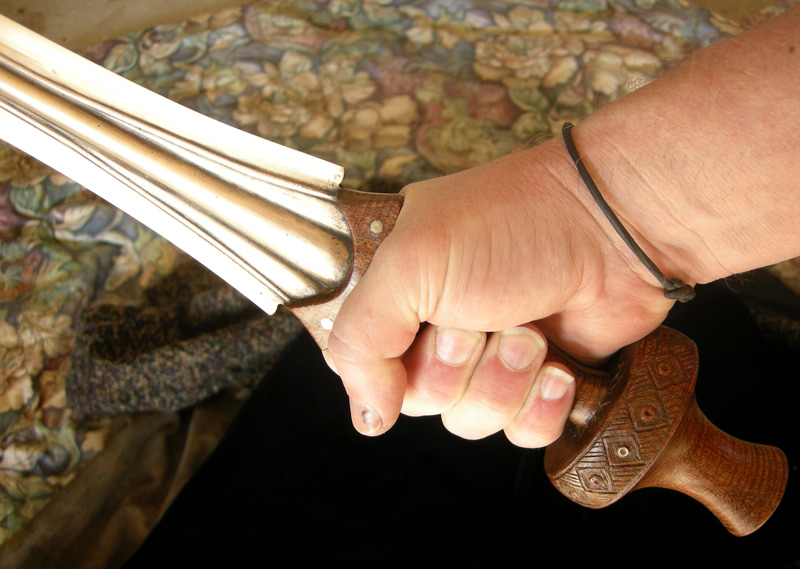
Once again I reshaped the inside of the pommel hole to get a snug fit with the pommel facing the other direction. Once this was done, and the pommel was put in place, when I griped the sword it appeared that the grip was a little too long. But how could I shorten the grip this late in the game? Eventually I came up with a solution. Cut out the hole in the pommel even deeper so that it set further down on the grip. I drew a line on the grip to mark how deep the pommel would have to seat to give the correct grip length. Then using a spherical wood cutting bit on the dremmel, I went to town on the inside the pommel and ground out all my hard work, opening it up enough that the pommel set further down on the grip. Eventually I was able to shorten the grip from 100mm to 93mm.

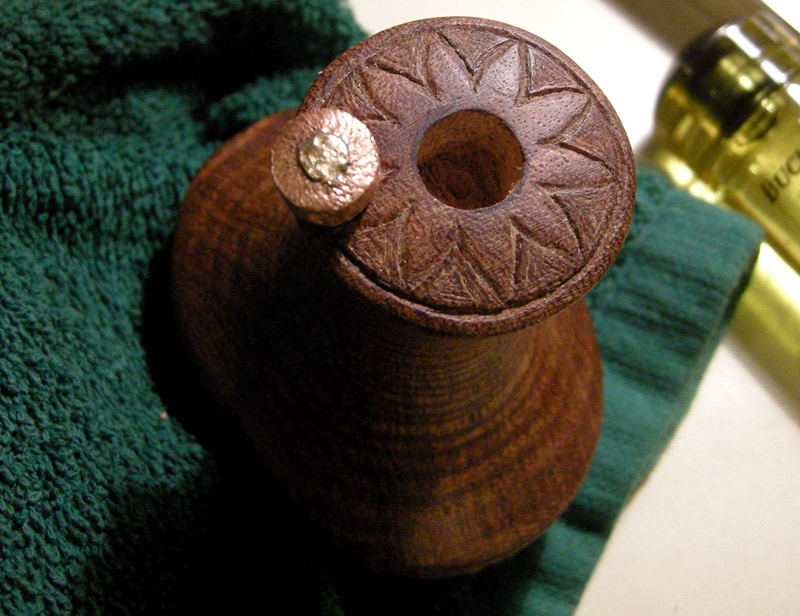
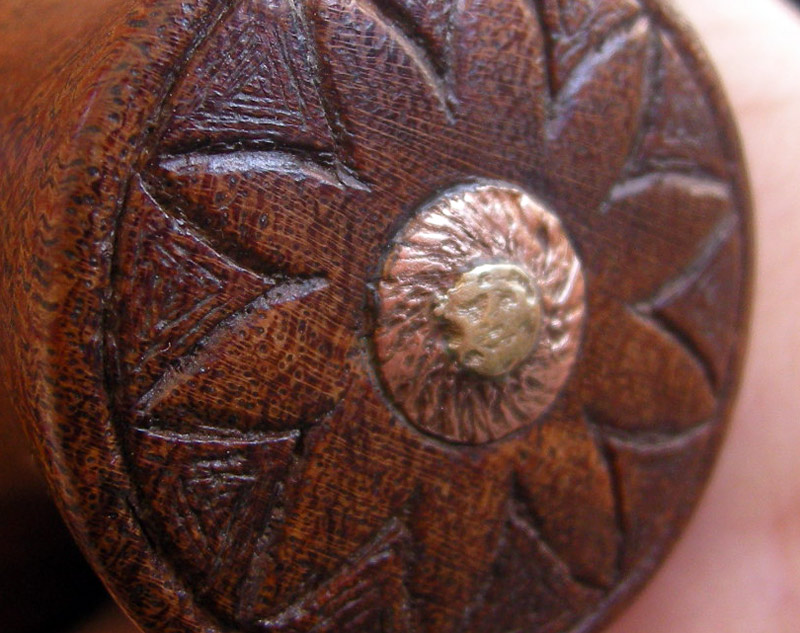
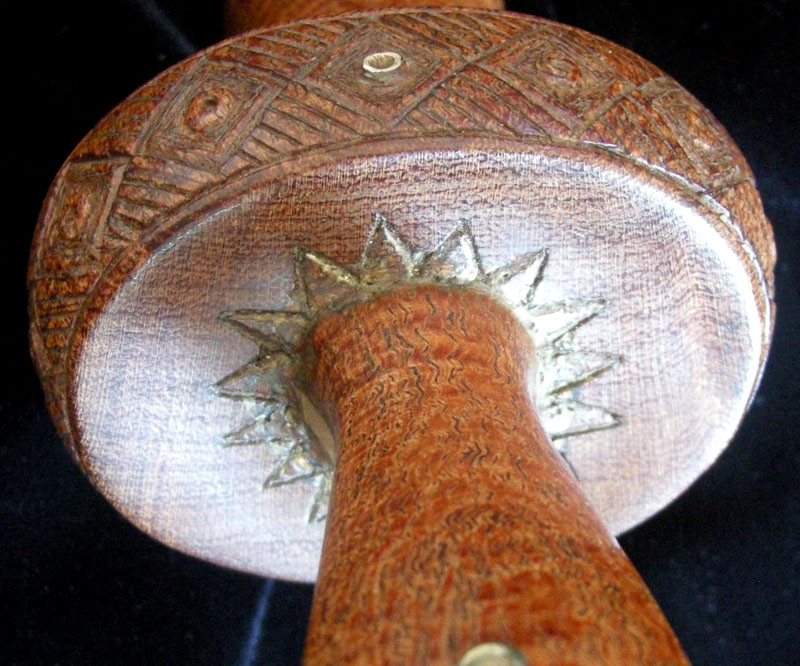
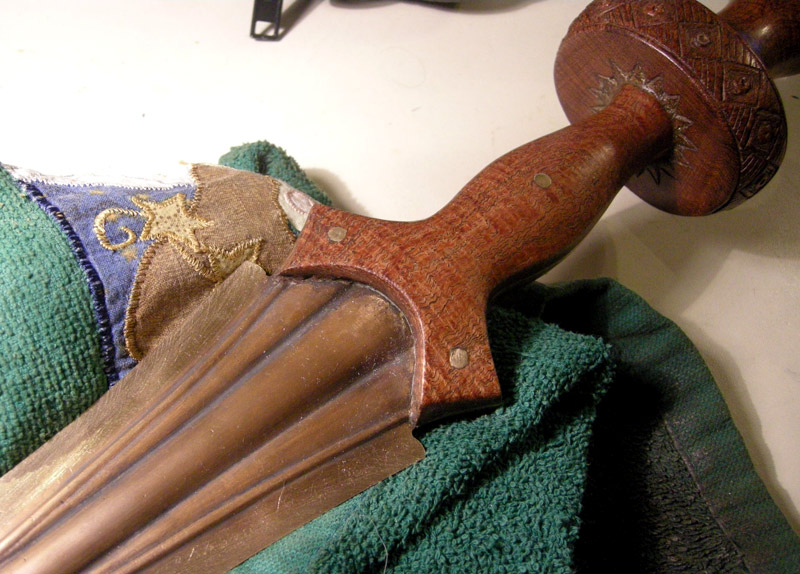
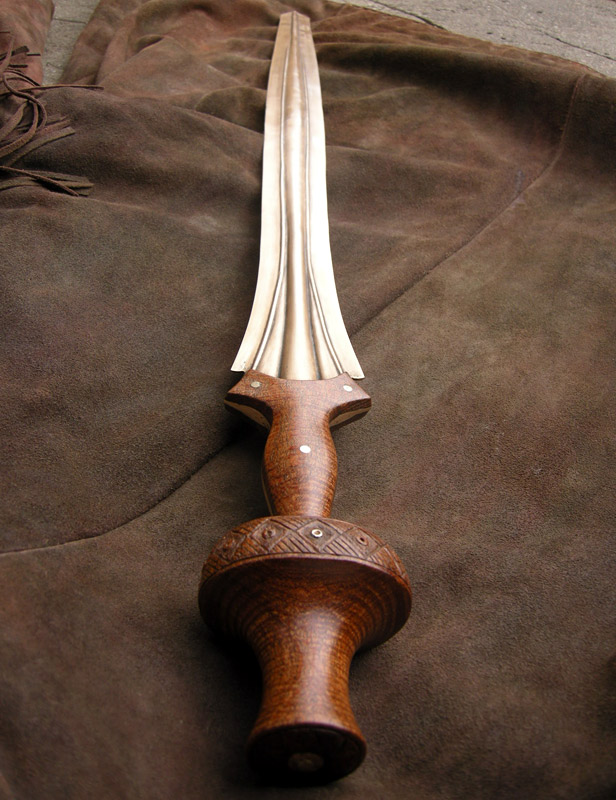
Before gluing everything down, I made sure the inside of the pommel hole and the outside of the wood of the pommel tang of the grip were very rough to provide lots of surface area. Then I filled it all with JB weld. I set the pommel onto the pommel tang and then held everything in place, making sure that everything was straight and even from all directions, checking it and rechecking it every few minutes to be sure it was still straight.

ks


 Attachment: 148.06 KB
88.PommelReadyForAttachment.jpg

Pommel Rivet
The end of the tang on the Mindelheim is a tab-like extension called the “pommel tang.” On original finds of Mindelheim swords there is very often a hole through the pommel tang indicating that one more device was used to keep the pommel in place—a rivet that went through the pommel and through the tang at this location. I also added this feature to my Mindelheim. Once the pommel was attached, I drilled a hole into the pommel and through the tang at this location. Then I epoxied a steel finishing nail into this hole. Again I covered the hole at the surface of the pommel with a false rivet head of bronze.

ks


 Attachment: 143.85 KB
89.PommelTangRivet.jpg

Filling the Gap
I had originally cut the hole in the bottom of the pommel so that the pommel would seat at the widest part of the pommel tang where the grip is thicker in diameter. So when I cut the hole deeper so that it would seat further down the grip where the diameter is smaller, it left a gap of about a quarter inch all around the bottom of the pommel between the grip surface and the larger pommel hole. :mad:

I just allowed the epoxy to fill this gap as the pommel was attached. And once it was cured, I cut out the epoxy and filled this gap with triangular chips of black mesquite glued into place with wood glue. Once it was sanded down it looked okay from a distance but on closer examination it was unsightly. So to cover up this revision, I carved a few more triangles. It seemed appropriate to have a triangular design on the bottom of the pommel to match the same on the top. Such design is not completely out of character for period finds. There is a gold foil design in this location on the famous Oss Mindelheim find.

ks


 Attachment: 146.72 KB
91..PommelBottomDesign.jpg


 Attachment: 93.32 KB
91.HaC.TypMindelheim.L83.Iron.Noord-BrabantOssNetherlandsClose.ROL.AdV.jpg

Final Finishing on the Hilt
I had finished and refinished the hilt several times in making the corrections. The finish was really simple, just boiled linseed oil rubbed into the wood with the green terrycloth towels seen the earlier pictures. I found the pressure points on the grip where my hand would rub the wood of the grip and burnished these areas to make the grip look worn, however because I did not use stain, as I have in other projects, these worn areas do not stand out in the pictures.. there is not much contrast when refinished. I also burnished the faux rivet heads and did a final reshaping and refinishing on the sides of the pommel.

ks


 Attachment: 142.42 KB
92..RoughBladeBurnishRivets.jpg

Polishing and Antiquing the Blade
I used course sandpaper to smooth out the rough surface of the casting. Because Neil did such and excellent casting job, this did not take very long. I used finer and finer grit sandpaper to remove the sanding marks. I finally used fine emery cloth to get a mirror polish on the blade. However, I didn’t like the look so I got some 220 grit sand paper and gave it more of a matt look.

To make the beautiful beading on the blade standout and to make the sword appear that it had spent some time in the field, I bought some liver of sulfur to antique the blade. I took a small chip and placed it in hot water in a coffee cup, crushing it with the end of a knife to get it to dissolve. This solution was then moped onto the blade. In few seconds it began to darken. It was splotchy so I took some steel wool to even it out. The steel wool not only evened out the tone, it also broke the surface tension and allowed the solution to stick to the blade better. I did this a few times, trying to use a more dilute solution each time and polishing the higher parts of the blade with steel wool to get the look I wanted.

ks


 Attachment: 143.17 KB
93..BladeRoughClose.jpg


 Attachment: 143.08 KB
93.BladeAntiqued.jpg

Finally… Finished

For more information on Mindelheim swords and other swords of the Hallstatt C period:

http://www.myArmoury.com/talk/viewtopic.php?t=3475


Here are the final stats:

Overall Length: 85cm (33.5 inches)
Blade Length: 68cm (26.75 inches)
Width at Shoulders: 62mm (2.4 inches)
Maximum Blade Width at COP: 45mm (1.8 inches)
Cog: 17.8 cm (7 inches) from shoulders
Pommel Width 72mm (2.8 inches)
Pommel Height 77mm (3 inches)
Weight: 1030 grams (2.27 lbs)


Hope you have enjoyed seeing some of the process…

Take care,

ks


 Attachment: 145.48 KB
94.AllAngle.jpg


 Attachment: 148.82 KB
96.AllDiag..jpg


 Attachment: 144.72 KB
98...HiltFar.jpg


 Attachment: 145.14 KB
98..HiltClose.jpg

Here are a few more....

ks


 Attachment: 147.75 KB
98.MindelheimHilt.jpg


 Attachment: 147.74 KB
99....PommelTop.jpg


 Attachment: 142.71 KB
99...AllEnd.jpg


 Attachment: 144.36 KB
100.InHand.jpg


 Attachment: 143.28 KB
101.MindelheimFinal.jpg

Serious congratulations are in order here for a beautiful piece of work with a very well presented record of its construction.
Gorgeous! A Hallstatt king would definately approve! Welcome to the Mindelheim club :)
It really turned out great. I can't believe you waited so long to post it! When I do work that's even 1/10 as detailed I rush to go show it off on the forums! I cross-posted this over at the Bronze Age Center, where we never get bored of such fine photographic collections. :D
Absolutely stunning work. I thoroughly enjoyed the process and seeing the finished product. :cool:
Wow....that's just spectacular. Really great craftsmanship and detail too.
Great work on this project, I love the look of the finished blade.

Keep us posted on your next project. These are always a great enjoyment to follow. :)
Splendid work, and very well documented too! Thanks for sharing this Kirk.
Hey Kirk
excellent sword.
Works done by hand, seem to tell the story, this, if they done as well.
You have a great skill for this.
Kirk

Trully gorgeous work on the hilt / pommel and that Neil Burridge blade is extremely beautiful as well.

So when are you going to start to do some reviews on the various swords you have for the REVIEWS page including that masterpiece by Patrick Barta, the Fetter Lane sword?

Danny
Sorry I'm so late in responding... it has been a busy week.

I want to thank each of you for your encouragement. This has been a great project.

This is the first sword I have presented that I felt was a collaborative effort. Neil Burridge did such a fantastic job in recreating this beautiful blade, I wanted to make sure the finished project reflected his attention to detail.

I am glad you all enjoyed the process :) .

take care

ks
Go to page Previous  1, 2, 3  Next

Page 2 of 3

Jump to:  
You cannot post new topics in this forum
You cannot reply to topics in this forum
You cannot edit your posts in this forum
You cannot delete your posts in this forum
You cannot vote in polls in this forum
You cannot attach files in this forum
You can download files in this forum


All contents © Copyright 2003-2006 myArmoury.com — All rights reserved
Discussion forums powered by phpBB © The phpBB Group
Switch to the Full-featured Version of the forum