| myArmoury.com is now completely member-supported. Please contribute to our efforts with a donation. Your donations will go towards updating our site, modernizing it, and keeping it viable long-term.
Last 10 Donors: Daniel Sullivan, Anonymous, Chad Arnow, Jonathan Dean, M. Oroszlany, Sam Arwas, Barry C. Hutchins, Dan Kary, Oskar Gessler, Dave Tonge (View All Donors) |
| Author |
Message |
Julien M

|
 Posted: Mon 07 Nov, 2011 9:51 am Post subject: Posted: Mon 07 Nov, 2011 9:51 am Post subject: |
 |
|
Hi Gregory,
Thanks a lot.
And yes the A. chevalier is one of the rare modern replicas featuring this type of grip treatment. I have to test and try with photoshop.
As I was telling Dan earlier on PM, though I really like how such grips look on artistic depictions (effigies and manuscript), I am not that found of it when looking at the real thing up close (P Johnson pulled a couple of splendid ones on recent custom work though). I am also not 100% confident I can make it with the current materials I have, and that's true, I would not be sure how to interpret the example above (the flower motives cannot be made of 5 nails (one center 4 around...I'd rather think these are intricate leather (or cord) knotwork...not sure at all).
Other alternative: tolled leather grip, but researching that idea might slow down the completion of this project, and I am not even sure I have seen any example of tooled grip so early (1275-1350). If you have, please post pictures!
The safe road is the good old cord over leather imprints, which would sort of redeem this pristine but yet discarded yeoman blade into the ranks of the next gen line up 
Don't know yet and I'll gladly take suggestions.
Cheers,
J
|
|
  |
 |
Sean Flynt

|
 Posted: Mon 07 Nov, 2011 11:10 am Post subject: Posted: Mon 07 Nov, 2011 11:10 am Post subject: |
 |
|
I think it's gorgeous! FWIW, my view of grip decoration is my view of other sword/arms/armour decoration. It's hard work to achieve beautiful forms in blade, hilt and grip. It's hard work to assemble those separate elements in a way that is harmonious overall and enhances the beauty of all. The only way decoration can improve that is if it is the technical equal of all that other work and enhances rather than distracts from the overall beauty of the piece.
-Sean
Author of the Little Hammer novel
https://www.amazon.com/Little-Hammer-Sean-Flynt/dp/B08XN7HZ82/ref=sr_1_1?dchild=1&keywords=little+hammer+book&qid=1627482034&sr=8-1
|
|
   |
 |
Glennan Carnie

|
 Posted: Sun 04 Dec, 2011 4:30 am Post subject: Posted: Sun 04 Dec, 2011 4:30 am Post subject: |
 |
|
Having now had the pleasure of handling this sword I can say the pictures don't do it justice! This is a simply stunning piece of work. In the hand it is effortless - so much so it initially shocked me!
I look forward to seeing it finished.
|
|
  |
 |
|
Peter Johnsson
Industry Professional
|
 Posted: Sun 04 Dec, 2011 5:15 am Post subject: Posted: Sun 04 Dec, 2011 5:15 am Post subject: |
 |
|
Julien, good work!
It is a good idea to use cris cros binding for the grip.
My interpretation of the effigy posted on the previous page is that it is a cord or wire bound grip with criss cross over binding. The flowers are decorative washers fastened by the nails.
I have seen a couple of examples of swords where there has been a straight wire wrap (silver in both cases) covered by what was probably once silk cord in a criss cross binding.
You could do a cord bound leather grip base and cover it with a criss cross binding of leather thongs. Make the grip skinnier than you think. This kind of construction builds quite a bit of volume. Use low nail heads, or it will be too much for the grip.
Looking forward to see the final result :-)
|
|
   |
 |
Julien M

|
 Posted: Sun 04 Dec, 2011 7:00 am Post subject: Posted: Sun 04 Dec, 2011 7:00 am Post subject: |
 |
|
| Glennan Carnie wrote: | Having now had the pleasure of handling this sword I can say the pictures don't do it justice! This is a simply stunning piece of work. In the hand it is effortless - so much so it initially shocked me!
I look forward to seeing it finished. |
Hi Glen,
Really glad you liked it!
The blade itself should get most of the credit for the superb handling, I was just careful to preserve the stats and harmonics of the original yeoman (I never handled one though, so exactly the same weight, same POB etc). I am impatient to finish this, as it may well be the most agile sword I'll own.
It was really a treat to meet you all Saturday and my only regret is that there was too little time left (and much fatigue!) to chat around a pint.
Hope our path will cross again soon.
| Peter Johnsson wrote: | | My interpretation of the effigy posted on the previous page is that it is a cord or wire bound grip with criss cross over binding. The flowers are decorative washers fastened by the nails. I have seen a couple of examples of swords where there has been a straight wire wrap (silver in both cases) covered by what was probably once silk cord in a criss cross binding. You could do a cord bound leather grip base and cover it with a criss cross binding of leather thongs. Make the grip skinnier than you think. This kind of construction builds quite a bit of volume. Use low nail heads, or it will be too much for the grip. |
Hi Peter, many thanks for the feedback and for the advice, much appreciated!
I'll research and try this for sure. I have seen so many depictions of type XIV with this type of grip that I have to give it a go, or at least seriously consider it. As the base I could indeed use a leather with cord imprint, or cord soaked with beeswax maybe. However, purely from a handling perspective, I find the that the many raisers (such as the next gen squire) is the most comfortable and secure grip type for my hands...but aesthetically I know what to expect, it's very nice but I've done it before for a gen 2 Henry V revamp. Not sure yet if I am going to choose the lazy path on this one, as I have fewer and fewer time to spend on these projects lately 
Cheers,
Julien
|
|
  |
 |
Johan Gemvik

|
 Posted: Tue 06 Dec, 2011 4:13 am Post subject: Posted: Tue 06 Dec, 2011 4:13 am Post subject: |
 |
|
That crossguard is just perfect! Looking forward to seeing the custom wrap.
"The Dwarf sees farther than the Giant when he has the giant's shoulder to mount on" -Coleridge
|
|
  |
 |
Julien M

|
 Posted: Thu 26 Sep, 2013 1:40 am Post subject: Posted: Thu 26 Sep, 2013 1:40 am Post subject: |
 |
|
Ok time for me to complete this project. I could finish this project in a couple of hours with a straight forward cord over leather grip, then pin on, but I don't want to be lazy so I'll stick to the diamond-pattern strap and will do a pin block as well.
Played around with the diamond-pattern strap overwrap yesterday and I think I now have it right (below - and I don't plan on using such a thick strap of leather, this is just for practice and to check this style works well with the sword - unsurprisingly it does (IMO), being very popular and seen on plenty of historical sources for type XIV swords), though a few questions remains:
for those who have experience with making such grips, or those who are lucky enough to own an Albion chevalier, I have a few questions:
the strap is simply wrapped around the grip right? No glue?
Has a nail ever come out while handling the sword? Is this type of wrap going to last? I'm still searching for the right nails (upholstery nails??). The grip is quiet thin already, and will need to go thinner as per Peter's advice. These must be very short nails or else they would meet the metal tang very quickly. I'm struggling to understand how such small nails can make for a durable wrap.
Most importantly: how to you secure the very end of the cord? No pictures of the A chevalier shows that side of things.
I suppose the two strap end overlap, and are secure by a nail on one of the side of the grip. Could anyone post of picture of that? That would be a great help.
J
sorry for the poor iphone pictures - my lumix is in 3 parts on my desk...with sand stuck in the lens...


|
|
  |
 |
Bryan Heff

|
 Posted: Thu 26 Sep, 2013 5:09 am Post subject: Posted: Thu 26 Sep, 2013 5:09 am Post subject: |
 |
|
|
That sword is gorgeous. I think if you can do it, the diamond cross straps on the grip ARE the way to go. Perfect for that sword.
|
|
  |
 |
|
Peter Johnsson
Industry Professional
|
 Posted: Thu 26 Sep, 2013 6:39 am Post subject: Posted: Thu 26 Sep, 2013 6:39 am Post subject: |
 |
|
Hi Julien,
I use both glue and tacks to keep the leather thongs secure. Make sure to wipe away all excess glue or the result will look terrible.
Make the "stem" of the nail thin so it bends upon contact with the tang. You can use a longer nail that way and the bent stem will keep it more securely in place. To be on the safe side, also use glue as you tap the nail in.
Make a test piece before you try it on your sword. It is not really difficult, but it can be nerve wracking the first time you do it. -Better get used to the technique on something else first.
I have never heard of the nails coming loose in use. When you use glue to secure the thongs, the nails arenīt that critical anyway. It is like using bracers and belt.
Use thin leather for the thong. It has to be thinner than you perhaps think, or the result will become ungainly.
Good luck! This will be a very handsome sword :-)
|
|
   |
 |
Sean Flynt

|
|
   |
 |
Julien M

|
 Posted: Thu 26 Sep, 2013 9:59 am Post subject: Posted: Thu 26 Sep, 2013 9:59 am Post subject: |
 |
|
Thanks for the comments, and for these precious advice - This is extremely helpful and will speed up progress here.
So glue is applied too...now I can see how this can easily turn into a complete mess. I typically use wood glue, it's not too runny but there will be a need to adjust the strap placement to match all sides correctly.
OK I understand how the nail should work. I'll adjust the length for each, as the grip is damn thin close to the guard, and more beefy in the middle. I don't want the tip to come off on a side so annealing is probably a good idea.
I still need the appropriate nails for this. I don't think I'll go as far as making washers as on the source I'm using, but might file the nails heads into a flowery shape (need to test this before - this can look either good or downright silly.
| Peter Johnsson wrote: | | This will be a very handsome sword :-) |
Thanks Peter, much appreciated. Can only take credit for forging the guard though - after all both (this superb) blade and pommel were designed by you 
|
|
  |
 |
|
Tim Lison
|
 Posted: Thu 26 Sep, 2013 10:14 am Post subject: Posted: Thu 26 Sep, 2013 10:14 am Post subject: |
 |
|
|
This is looking great! I love that cross guard. Can't wait to see it al finished...
|
|
  |
 |
|
Jack Smith
|
 Posted: Thu 26 Sep, 2013 11:02 am Post subject: Posted: Thu 26 Sep, 2013 11:02 am Post subject: |
 |
|
i think it's great. to bad you made knobbed ones. the normal was quite good, but it is still great

Alea iacta est.
|
|
  |
 |
|
Jack Smith
|
 Posted: Thu 26 Sep, 2013 11:05 am Post subject: Posted: Thu 26 Sep, 2013 11:05 am Post subject: |
 |
|
also, how do you actually post a subject?
not really sure.
thanks
J 
Alea iacta est.
|
|
  |
 |
Julien M

|
 Posted: Fri 27 Sep, 2013 5:33 am Post subject: Posted: Fri 27 Sep, 2013 5:33 am Post subject: |
 |
|
Thanks Guys. I hesitated between the two designs quiet a bit but I like to complicate things needlessly 
I prefer the knobbed quillons myself by a long shot.
Jack - To post a new topic: log in, go to the home page, click on forum, choose the appropriate forum to start a discussion, click on new topic - done.
Cheers,
J
|
|
  |
 |
Julien M

|
 Posted: Tue 01 Apr, 2014 3:31 am Post subject: Posted: Tue 01 Apr, 2014 3:31 am Post subject: |
 |
|
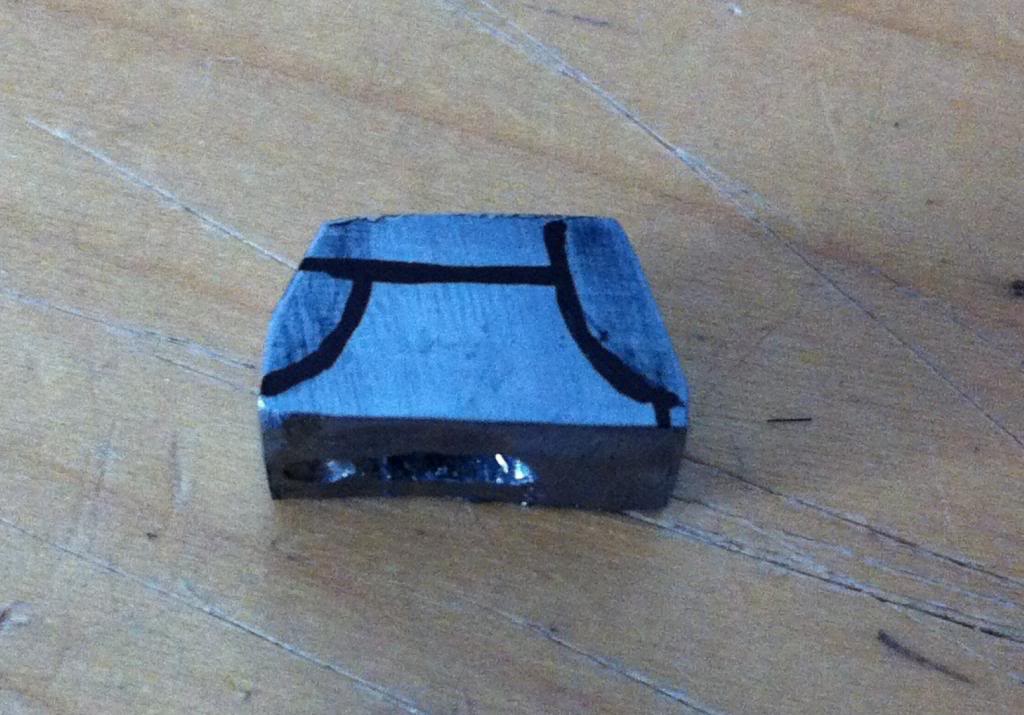
Alright, peen block is drilled now on to the filling.
So small a part yet quiet a headache.
It spreads on both sides from the tang, so it has to be correctly aligned with the square shape of the tang. it's arched on both sides, and the pommel is curved, so the base has to be filled accordingly...and this is quiet hard to achieve with a hand file.
If I had been in a forge, I would have heated it and hammer directly on the pommel for the peen base to match the shape of the pommel.
I'm almost there for the rough fitting. I can still blow this. A bit too much filling here or there, very easy to mess such tiny details up. I'll try to work mostly with the peen on the tang like that, to achieve the best symmetry possible.


And after that, complex wrap ahead...I want to learn new stuff in the process, so things drag along. Worth it I hope!
|
|
  |
 |
Sean Flynt

|
|
   |
 |
Sean Flynt

|
 Posted: Tue 01 Apr, 2014 8:24 am Post subject: Posted: Tue 01 Apr, 2014 8:24 am Post subject: |
 |
|
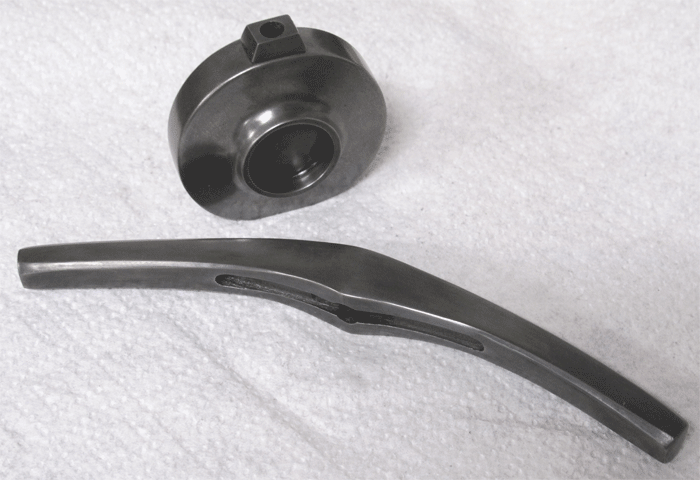
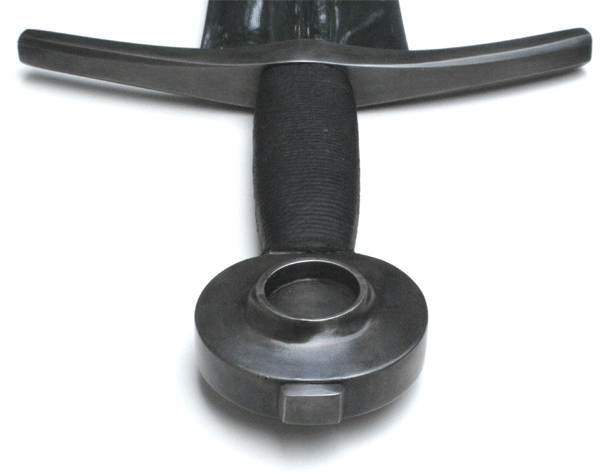
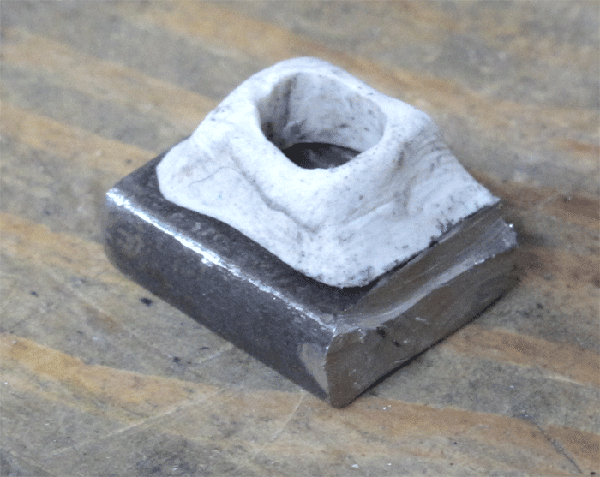
I'm trying to remember exactly how I made the block for my old Type XIV project. I know that I modeled it in clay first but I don't recall how I secured it for shaping. I clearly didn't do any shaping before I cut it off the bar, but I'm sure I drilled the blank and shaped around that hole. I might have just held it against the flat grinder face if I had that tool back then. Otherwise, it was a vise and files. Shaping the base to the pommel was probably files and/or the rounded edge of the grinder or Dremel sanding bit.
The top of the hole was definitely countersunk to allow a flush peen, but I might have done that after I blued the parts. I can't see the countersink here.
I do make lots of dark hilts don't I? I need to lighten up! 
 Attachment: 197.48 KB Attachment: 197.48 KB

 Attachment: 72.39 KB Attachment: 72.39 KB

 Attachment: 169.18 KB Attachment: 169.18 KB

-Sean
Author of the Little Hammer novel
https://www.amazon.com/Little-Hammer-Sean-Flynt/dp/B08XN7HZ82/ref=sr_1_1?dchild=1&keywords=little+hammer+book&qid=1627482034&sr=8-1
|
|
   |
 |
Julien M

|
 Posted: Tue 01 Apr, 2014 8:56 am Post subject: Posted: Tue 01 Apr, 2014 8:56 am Post subject: |
 |
|
That was a very neat job Sean, I remember it well. You just reminded me I could use a drum sander with the dremel, will try that as the 4 corners of the peen block are not in contact with the pommel, and it's hard to know what to remove.
Another solution, probably simpler, would be to peen like that, and fill the gap with plummer solder, then file the excess off.
Drawback, the solder does,'t age the same way as steel, so it would take a bit of regular cleaning for it to remain invisible.
|
|
  |
 |
Sean Flynt

|
|
   |
 |
|
|
You cannot post new topics in this forum
You cannot reply to topics in this forum
You cannot edit your posts in this forum
You cannot delete your posts in this forum
You cannot vote in polls in this forum
You cannot attach files in this forum
You can download files in this forum
|
All contents © Copyright 2003-2024 myArmoury.com — All rights reserved
Discussion forums powered by phpBB © The phpBB Group
Switch to the Basic Low-bandwidth Version of the forum
|

