| Author |
Message |
Julien M

|
 Posted: Fri 18 Apr, 2014 4:45 am Post subject: Posted: Fri 18 Apr, 2014 4:45 am Post subject: |
 |
|
Wow - thanks for the positive comments everyone - this is very encouraging, and much appreciated.
The fact that I have no decent space to work has been weighting on my motivation since I moved away from Britain...but my projects and learning curve are still moving on somehow, so I'm glad (my computer screen would say otherwise (I work mostly on my desk, files and sandpaper mixed to my day job stuff - complete chaos  )...As I was handling the sword to fit the nails, the tip of the sword I had clamped in a vice dug a 5 cm deep scratch on the surface...collateral damage )...As I was handling the sword to fit the nails, the tip of the sword I had clamped in a vice dug a 5 cm deep scratch on the surface...collateral damage  ) )
If I had to do another, I would look for proper non dyed veg tan straps that I can tool. My original idea was to stamp tiny fleurs de lys all along the strap, in white, on a blue background...
Dean, I've hammered and glued the nails. So I cut each to the estimated length of soft material (wood and leather) to the tang, adding a drop of superglue to mark the spot and further secure it once hammered. Epoxy would work, but the nail goes through both leather and wood, and are very solidly held in place. The real hassle here was the search for suitable nails on the web...If you need more insights don't hesitate to shot me a PM.
Tod, many thanks for your comments and renewing your offer - I will make this happen! I'll carve and wrap a core and will schedule something with you - I should be able to combine this with a business trip in the coming month.
Peter thanks again for your guidance on this project and for your inspiring work.
PS: It's just a light trick Jeffrey, the blade is perfect in it's contours. The only thing that made this a second blade is a very very slight and barely noticeable shift of the fuller to the right - something I would never have noticed if this had not been pointed ou to me.
|
|
  |
 |
Julien M

|
 Posted: Thu 24 Apr, 2014 2:07 am Post subject: Posted: Thu 24 Apr, 2014 2:07 am Post subject: |
 |
|
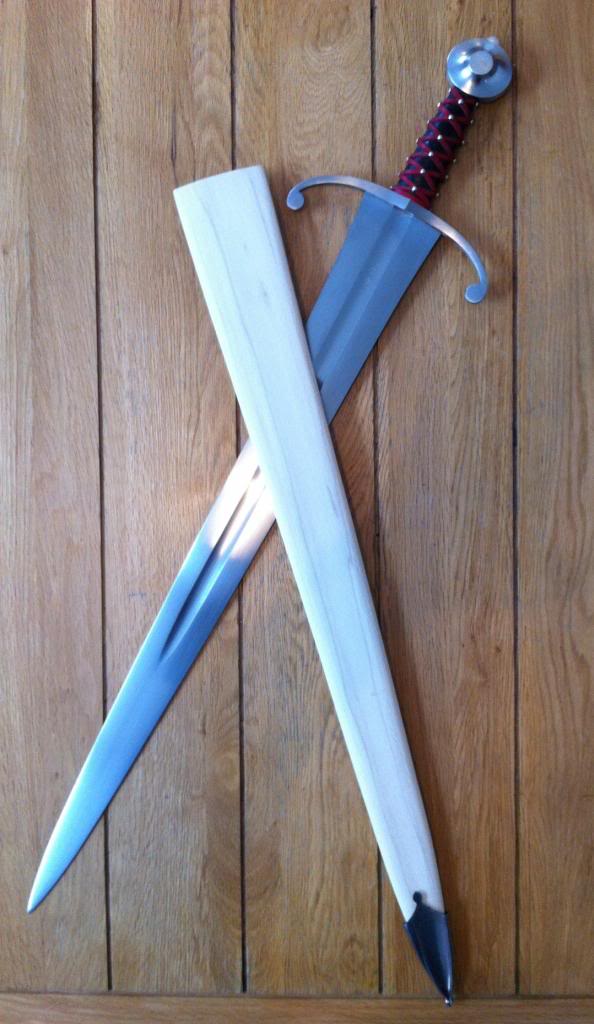
Thin poplar wooden core - done
and surprise, an old windlass Shloss Erbach shape that fits like a glove. I will rework this shape but it's a good starting point.
I will try to aim close to effigies of the period, so there will be a leather overlap reaching above the guard and metal lockets.
A few words about the core: I always found the inner carving relatively easy, but in this case the blade is very wide and so it took a lot of chisel work. Planks had to be glued together as I didn't have wide enough boards to start with. All in all, a bit more difficult than usual. As for the outer sanding, my tiny belt grinder remains my tool of choice, but with no possibility to work outside it had to happen in the small 3m*2m laundry room that serves as an improvised workshop too and where I can't even fully stand.
I've just made an epic mess in there (mask on of course). It will take two days for the dust to settle down there, and my wife will hate me tonight. Well...it's all well worth it 


|
|
  |
 |
Mike Capanelli

|
 Posted: Thu 24 Apr, 2014 7:41 am Post subject: Posted: Thu 24 Apr, 2014 7:41 am Post subject: |
 |
|
That some really beautiful work man. The sword looks outstanding. Better than the original for sure, IMO. I can't wait to see it all completed. Thanks for posting this.
Winter is coming
|
|
  |
 |
Dean F. Marino

Location: Midland MI USA Joined: 24 Aug 2011
Posts: 229
|
 Posted: Thu 24 Apr, 2014 5:26 pm Post subject: Posted: Thu 24 Apr, 2014 5:26 pm Post subject: |
 |
|
VERY nice core - well rounded, not too thick - picture perfect  . Note on the belt sander - if yours has a hole in the side for a vaccume attachment? I got VERY tired of the wood dust snowstorm effect. I attached my shop-vac to that dust hole in the belt sander, using nothing but duct tape (the holes never match the diameter of a shop vac hose). Running the shop vac while I sand has made a WORLD of difference . Note on the belt sander - if yours has a hole in the side for a vaccume attachment? I got VERY tired of the wood dust snowstorm effect. I attached my shop-vac to that dust hole in the belt sander, using nothing but duct tape (the holes never match the diameter of a shop vac hose). Running the shop vac while I sand has made a WORLD of difference  . .
In edhil, hai edhil. In edain, hai edain.
|
|
  |
 |
Julien M

|
 Posted: Fri 25 Apr, 2014 1:08 am Post subject: Posted: Fri 25 Apr, 2014 1:08 am Post subject: |
 |
|
Thanks guys. I'll pause and move on to other projects now, I don't feel like doing scabbard leather work at the moment. Main point was to provide safe storage for the blade and it's now done.
Dean, after reading your post I had a vague glimpse of a hose attachment that came with the sander. I moved houses too many times though and my hopes to find it were not high. To my great surprise, it took me about 2 minutes to find the damn thing laying in the bottom of a box. I'll still have to dust the all basement from floor to ceiling this time though. Thx for the reminder! 
PS: don't use your vacuum cleaner to collect freshly grinded metal dust. I killed a quality vacuum cleaner this way. Not only it made the hoover very smelly but dust went into the motor, made it sparkle and die (and of course, a spare motor does cost as much as the all piece of equipment  ) )
Last edited by Julien M on Fri 25 Apr, 2014 3:06 am; edited 1 time in total
|
|
  |
 |
|
Will S
Location: Bournemouth, UK Joined: 25 Nov 2013
Posts: 164
|
 Posted: Fri 25 Apr, 2014 2:43 am Post subject: Posted: Fri 25 Apr, 2014 2:43 am Post subject: |
 |
|
Julien, this is breathtaking work. I know so little about this stuff having only just started, but it doesn't take an expert to see just how damn GOOD this work is. Everything is so clean and neat and perfectly finished. Real inspiration that it doesn't take huge workshops and teams of people to create something that people would stop and look at it in awe.
Well done, dude.
|
|
   |
 |
Julien M

|
 Posted: Fri 02 Jan, 2015 10:57 am Post subject: Posted: Fri 02 Jan, 2015 10:57 am Post subject: |
 |
|

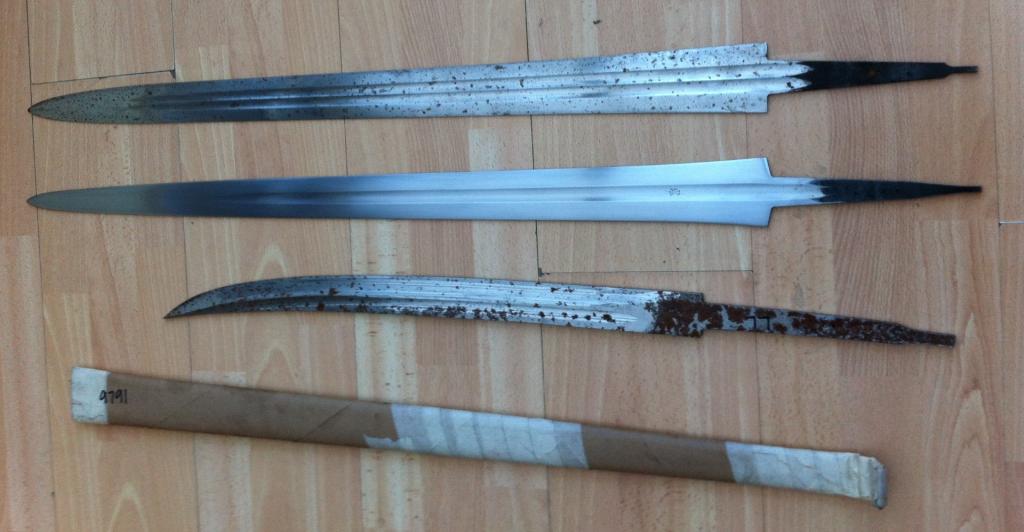
Was looking back at that picture, thinking I had hundreds of hours of work ahead of me (the Henry V is gone, and the Durer is in progress but that's it) - yet I could not resist another Albion moat.
3 new blades for more projects - a Solingen and a Vigil , and a...not sure what that is, probably from the Conan line up (the urge to work on a fantasy design has been growing in me over the years).
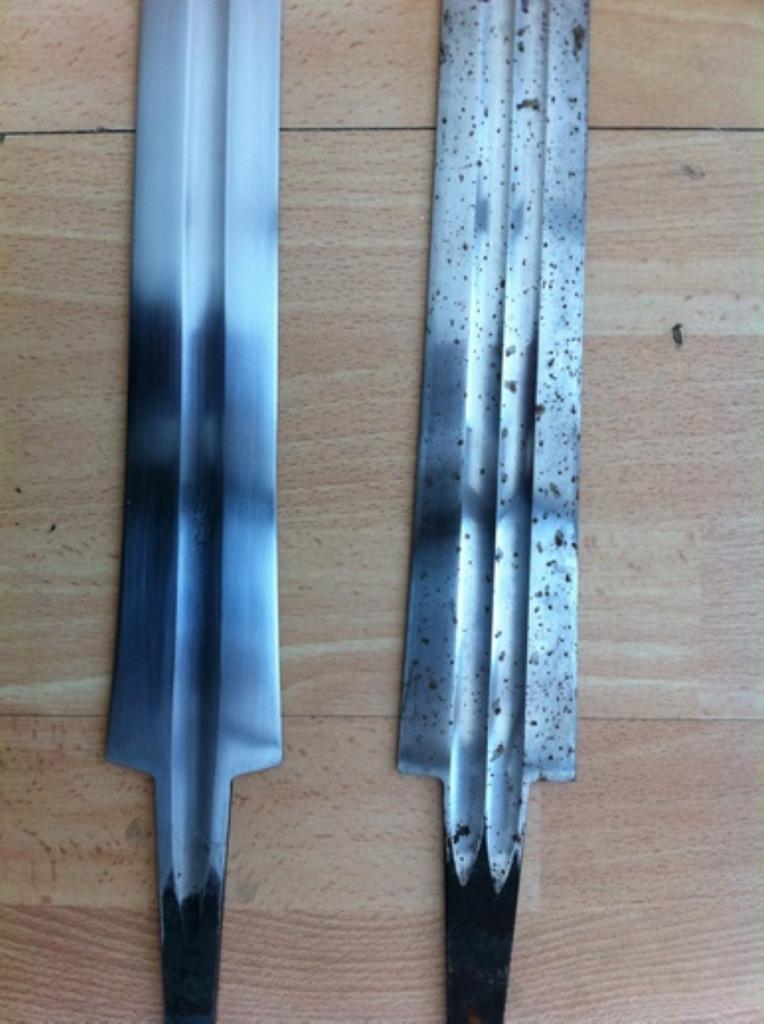
Both the Solingen and the Vigil had rust pits, otherwise, I can see no visible defects on any...they are superb blades begging to be mounted.
The short saber is barely ground, and will need a lot of grinding before it's mounted (blade weights more than 900 grams, and is very thick). The blades features a complex hollow ground set up, and I don't do hollow grinding...yet.
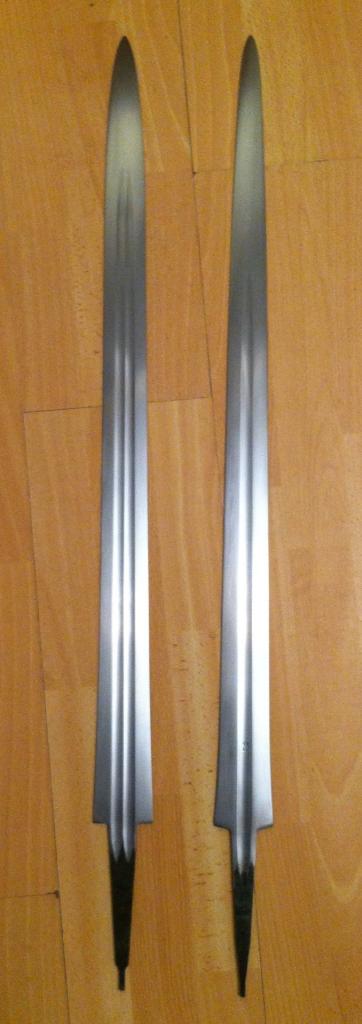
Both blades at the bottom after a couple of hours of sanding (60 to 120)...rusts and pits are all gone.
|
|
  |
 |
|
Will S
Location: Bournemouth, UK Joined: 25 Nov 2013
Posts: 164
|
 Posted: Fri 02 Jan, 2015 3:03 pm Post subject: Posted: Fri 02 Jan, 2015 3:03 pm Post subject: |
 |
|
|
Are you getting those blades shipped to Europe Julien? I contacted Albion regarding a moat type XV Blade and was told the shipping would be too expensive to make it worthwhile.
|
|
   |
 |
Julien M

|
 Posted: Fri 02 Jan, 2015 3:26 pm Post subject: Posted: Fri 02 Jan, 2015 3:26 pm Post subject: |
 |
|
| Will S wrote: | | Are you getting those blades shipped to Europe Julien? I contacted Albion regarding a moat type XV Blade and was told the shipping would be too expensive to make it worthwhile. |
Yeah, Albion ships exclusively UPS, which is horrendously expensive when shipping overseas (while with USPS it's affordable). With UPS, You'd probably end up paying more that twice the price of the blade if shipped direct to Europe yes. Worthwhile? Maybe, some of these moats are near perfect, other less so. I've been lucky with mine so far.
One thing for sure, better order many rather than one and ship in bulk, works out better as the shipping per blade will be lessened...or ship to a friend in the US. I travel there quiet often for work, that's how I got most of these.
Cheers,
J
|
|
  |
 |
|
Will S
Location: Bournemouth, UK Joined: 25 Nov 2013
Posts: 164
|
 Posted: Fri 02 Jan, 2015 4:35 pm Post subject: Posted: Fri 02 Jan, 2015 4:35 pm Post subject: |
 |
|
|
Thanks Julien! Sorry for the off topic question, your work is sensational and I'm looking forward to seeing what you create next!
|
|
   |
 |
Julien M

|
 Posted: Thu 07 Apr, 2016 3:25 pm Post subject: Posted: Thu 07 Apr, 2016 3:25 pm Post subject: |
 |
|
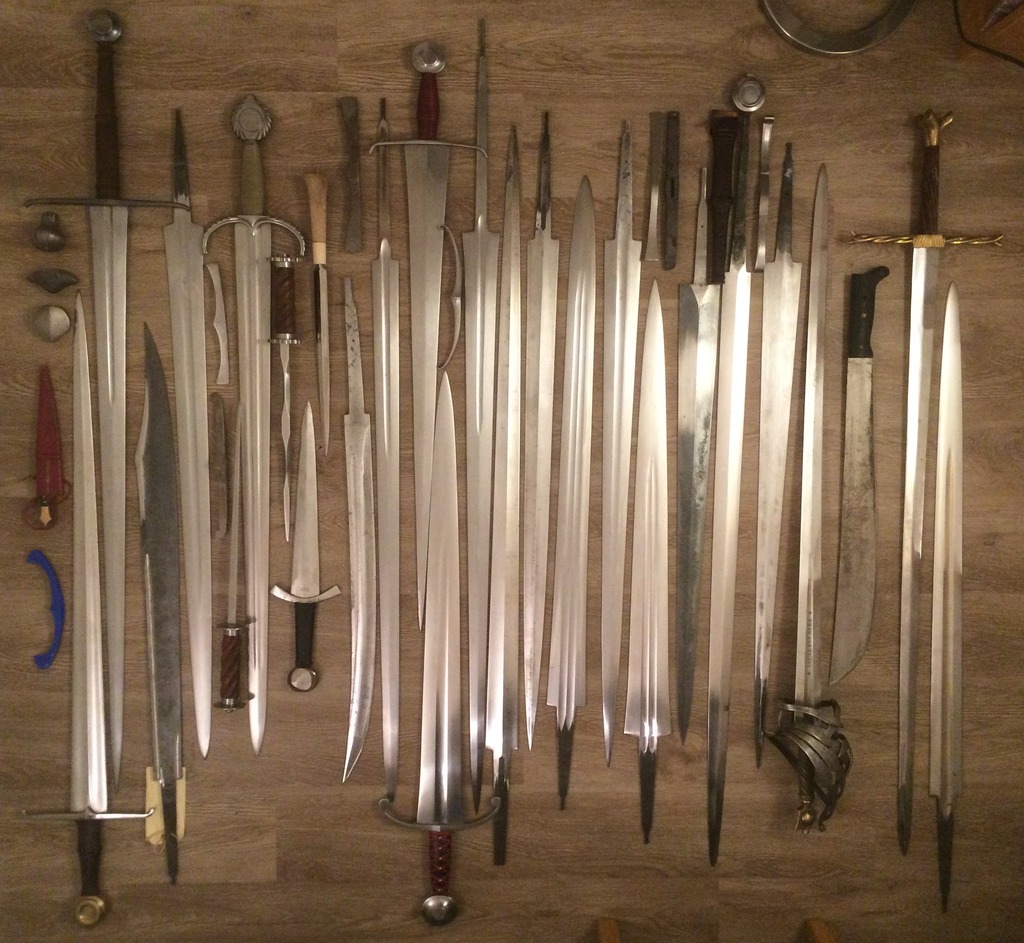
Alright, not really an update of any kind but rather a way to motivate me to undertake new projects. So here is my collection of complete swords and bits & bobs - a few changes compared to the previous group picture posted a few years back in this thread...some items left (the A&A town guard, the henry V gen 2) and new were added (various bare blades, a vladimir cervenka schiavona, a mediocre longsword made from darksword armoury fittings and a tinker longsword blade, a writhen hilt sword Royal Armoury wall hanger - bought for fittings, two cheap but sturdy rondels). Also many scabbards in progress for which I had no room in this picture.
based on the first picture, from left to right:
Julien M eating knife (with tod stuff)
Mark Vickers type XVIII
Darksword/Hanwei Tinker longsword
Albion vassal bare blade
Albion Solingen bare blade
rondel 1
windlass renaissance sword
rondel 2
Windlass sword hilted dagger - started to reground and thin down the pommel
Jody Samson cutlass bare blade
tod stuff rondel kit
Hanwei Tinker fuellered bastard bare blade
Julien m sword (with directions from owen bush)
Albion yeoman/julien m hilt/grip
Hanwei Tinker longsword bare blade
Albion regent bare blade
Albion kingmaker bare blade
Albion Vigil bare blade
Albion prince bare blade
Albion sovereign bare blade
Albion one handed Type XVIII bare blade
A&A durer longsword with tooled leather grip - leather rain guard - needs final assembly
Abion poitier bare blade
Vladimir cervenka schivona (my latest acquisition from another forumite here, a truly magnicicent sword, beautifully balanced, I'll post some better pictures soon)
Guadeloupe machete
Royal arnoury writhen sword wallhanger
Albion knight
Various guards and pommels
Given my usual workshop pace, I have enough work for the next 3 decades....!

|
|
  |
 |
|
Chip F.
|
 Posted: Fri 08 Apr, 2016 8:07 am Post subject: Posted: Fri 08 Apr, 2016 8:07 am Post subject: |
 |
|
|
Julien - beautiful work on the custom Yeoman. Can't wait to see how it looks with the completed scabbard, any thoughts on the color?
|
|
  |
 |
|
|
You cannot post new topics in this forum
You cannot reply to topics in this forum
You cannot edit your posts in this forum
You cannot delete your posts in this forum
You cannot vote in polls in this forum
You cannot attach files in this forum
You can download files in this forum
|
All contents © Copyright 2003-2024 myArmoury.com — All rights reserved
Discussion forums powered by phpBB © The phpBB Group
Switch to the Basic Low-bandwidth Version of the forum
|

