| Author |
Message |
|
Lukas MG
Industry Professional
|
 Posted: Sat 03 May, 2014 12:15 pm Post subject: Posted: Sat 03 May, 2014 12:15 pm Post subject: |
 |
|
Since I'm currently at university, no progress update but I got a (rough) drawing for you that shows what the sword will look like when done:

|
|
   |
 |
|
Lukas MG
Industry Professional
|
 Posted: Sat 10 May, 2014 8:07 am Post subject: Posted: Sat 10 May, 2014 8:07 am Post subject: |
 |
|
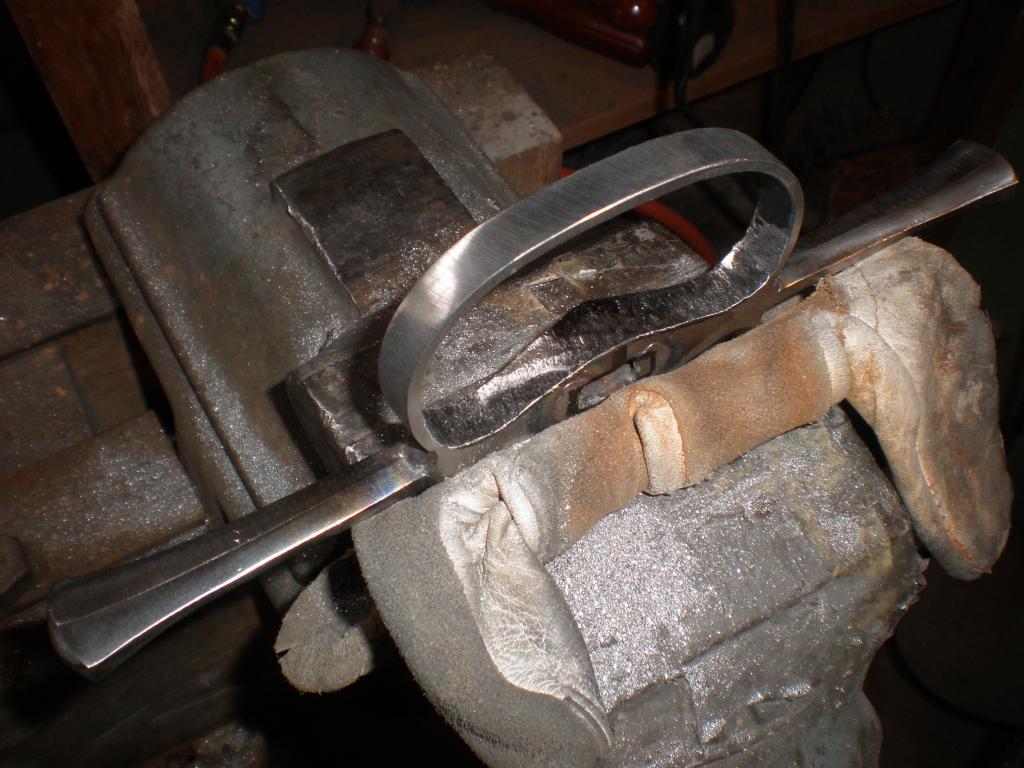
So, progress! After several hours of filing, I got the final guard shape. Still need to polish and get things smooth but this is pretty much what the guard will look like.


I draw filed the flats to get them nice and flat. This also gets rid of grinder marks and gives a handmade look.

With guards the most important thing is keeping them as light as possible while retaining the desired shape (and strength). Especially with complex guards, this can be quite a challenge. Originals have very sleek and elegant shapes and that's what I strive for as well. I think it turned out pretty good.
|
|
   |
 |
Julien M

|
 Posted: Sat 10 May, 2014 10:13 am Post subject: Posted: Sat 10 May, 2014 10:13 am Post subject: |
 |
|
Very clean work Lukas. Arc welding? Reminds me of the first one you made though, same ring material? (Can't check SBG is down).
Lidl had a sale on a cheap Parkside arc welding kit (less than 60 euros!), just grabbed one and seing this makes me want to try promto.
|
|
  |
 |
|
Lukas MG
Industry Professional
|
 Posted: Sat 10 May, 2014 10:35 am Post subject: Posted: Sat 10 May, 2014 10:35 am Post subject: |
 |
|
Mig welder I think. Took it to a welding shop, I don't have one yet. I'm certainly not going there again, the guy made me pay 40 Euros for 15 min of work... I need to look out for a cheap one. Don't think Lidl has some here though.
Yes, it's the same material as last time. Indeed quite similar:

|
|
   |
 |
Bryan Heff

|
 Posted: Sat 10 May, 2014 10:45 am Post subject: Posted: Sat 10 May, 2014 10:45 am Post subject: |
 |
|
That guard is looking good Lukas. I can't wait to see this finished sword.
The church is near but the roads are icy. The tavern is far but I will walk carefully. - Russian Proverb
|
|
  |
 |
|
Lukas MG
Industry Professional
|
 Posted: Sun 11 May, 2014 3:17 am Post subject: Posted: Sun 11 May, 2014 3:17 am Post subject: |
 |
|
Thanks guys.
I finished the guard. The only thing that remains is fitting the tang but that will have to wait until I get the blade back from the heat treater.
I didn't go for a high polish and left some file marks and slight pits in the steel, I feel that gives it an organic, handmade look. In the last pic one can make out the "grainy" finish a bit.


|
|
   |
 |
|
Lukas MG
Industry Professional
|
 Posted: Wed 11 Jun, 2014 9:19 am Post subject: Posted: Wed 11 Jun, 2014 9:19 am Post subject: |
 |
|
Quick heads-up: the blade survived HT and is on the way to me! I won't be able to work on it till next week but at least now it's for sure that this will be a sword!! 
Also, the pommel is being made by my friend as we speak...
Stay tuned for updates!!
|
|
   |
 |
|
Lukas MG
Industry Professional
|
 Posted: Thu 19 Jun, 2014 1:53 am Post subject: Posted: Thu 19 Jun, 2014 1:53 am Post subject: |
 |
|
So, I finally got the blade back from the heat treater. The blade has two pretty bad kinks on opposite sides and a bit of sabering in the lower part. On the bright side it hardened up very nicely and flexes great. The sabering I was already able to fix via grinding, the kinks will be a pain. I probably won't be able to get them out completely but I'm optimistic I'll get them to a point where very few people will be able to see it. Since originals a rarely perfect in this way, I'm not too upset about it.
I'll post pics once the blade is done, the kinks aren't really visible on pics so no point in showing them.
|
|
   |
 |
|
Lukas MG
Industry Professional
|
 Posted: Fri 20 Jun, 2014 3:26 am Post subject: Posted: Fri 20 Jun, 2014 3:26 am Post subject: |
 |
|
Ok, time for pics!!
I managed to get the kinks 99% out... here are some blurry pics (my camera died, had to take an old one):


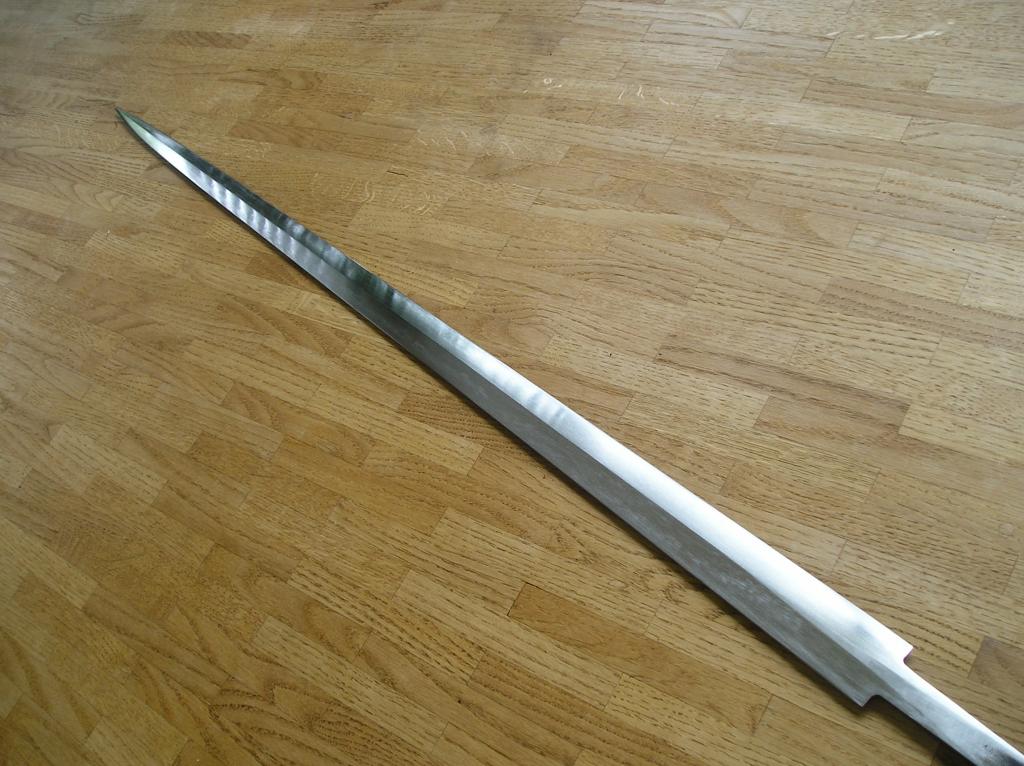
I also finished the final grind and foundation sharpening. This is what the blade looks like now:


Next up is hand sanding to clean up all remaining irregularities. The blade will also be sharpened and polished in the process.
I asked a friend with a lathe to make the pommel. Here it is, he did a stellar job: 

I still need to key it and shape the tang for a close fit. The guard also needs to be fitted.
|
|
   |
 |
|
Lukas MG
Industry Professional
|
 Posted: Sat 21 Jun, 2014 12:20 am Post subject: Posted: Sat 21 Jun, 2014 12:20 am Post subject: |
 |
|
So, the blade is finished:

I will do a final touch up after mounting but it's 99% there.

Did I mention that the point on this is absolutely brutal? 
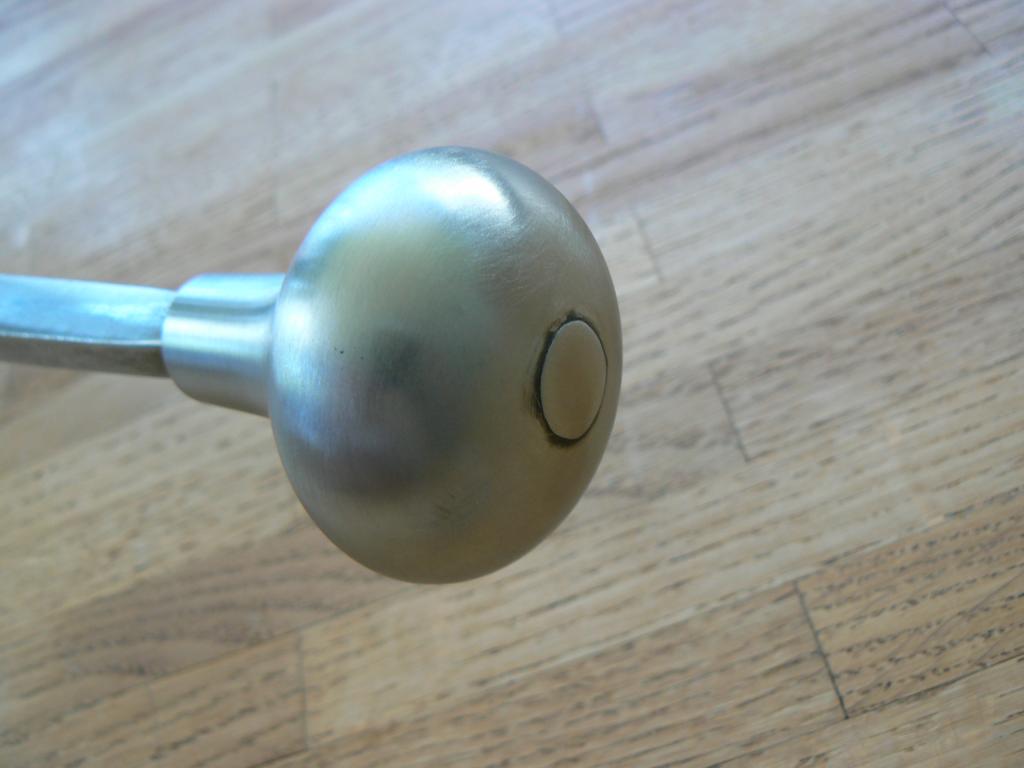
The pommel has been fitted as well. It's a 8mm round section with the lower part being rectangular to avoid turning. The transition is in the pommel, not below, which is important for durability. The fit is such that the pommel slips down easily for about 2/3 of the way but has to be beaten down the rest, wedging tightly. This is followed by back peening on the lower end and hot peening on top. The pommels I've mounted that way are almost impossible to get off even after the peen has be ground down.


|
|
   |
 |
Bryan Heff

|
 Posted: Sat 21 Jun, 2014 4:21 am Post subject: Posted: Sat 21 Jun, 2014 4:21 am Post subject: |
 |
|
Looking great Lucas, VERY clean. Question for you. When you hot peen, did you cut or file any kind of recessed area (like a bevel around the hole) where the peen will mushroom over, or does the peen mushroom over the hole as you show currently? Hope that makes sense. Another way to ask it is to you countersink the peen some into a shallow wider opening at the pommel hole?
Also, how much tang is needed, I hear its not a lot? My one and only other peen I had waaaay too much tang to start with.
The church is near but the roads are icy. The tavern is far but I will walk carefully. - Russian Proverb
|
|
  |
 |
Dean F. Marino

Location: Midland MI USA Joined: 24 Aug 2011
Posts: 229
|
 Posted: Sat 21 Jun, 2014 7:03 am Post subject: Posted: Sat 21 Jun, 2014 7:03 am Post subject: |
 |
|
| Bryan Heff wrote: | | .....Also, how much tang is needed, I hear its not a lot? My one and only other peen I had waaaay too much tang to start with. |
Would LOVE to know about how much to start with when peening as well. I've also run into the "too much tang" effect  . Near as I can tell, it seems to result in "too early" mushrooming . Near as I can tell, it seems to result in "too early" mushrooming  . I more or less recovered from it, but I didn't like it . I more or less recovered from it, but I didn't like it  . .
In edhil, hai edhil. In edain, hai edain.
|
|
  |
 |
|
Lukas MG
Industry Professional
|
 Posted: Sat 21 Jun, 2014 8:42 am Post subject: Posted: Sat 21 Jun, 2014 8:42 am Post subject: |
 |
|
Thanks guys.
I did slightly countersink the pommel but it's the first time that I did it and it's not necessary, unless you want to blend in the peen Albion style. I never do, I leave the peen standing proud. It's what's usually seen on originals. The only reason I did the countersink this time is that I wanted to give it a try. Used a slightly bigger drill bit and just touched the top hole. Voily, countersunk.
Regarding the amount of tang necessary for the peen... I take the sword to a machinery shop and use the torch there. It's a huge thing and really kicks. So I've never had a problem with too much tang and I like a big fat peen, so I usually leave about the tang thickness in length. Now, that's way more than necessary. Especially when doing a cold peen, that would only lead to frustration. A good amount for cold peening would be around 3mm I'd say but I have no experience with that.
|
|
   |
 |
|
Lukas MG
Industry Professional
|
 Posted: Mon 23 Jun, 2014 12:06 am Post subject: Posted: Mon 23 Jun, 2014 12:06 am Post subject: |
 |
|
Ready for peening:


|
|
   |
 |
|
Lukas MG
Industry Professional
|
 Posted: Mon 23 Jun, 2014 3:13 am Post subject: Posted: Mon 23 Jun, 2014 3:13 am Post subject: |
 |
|
After peening:

After clean up:

As with the guard, I'm going with a handmade appearance, no excessive polishing, just a simple, smooth surface. Much more durable and easier to maintain than a mirror polish. Also more appropriate for a practical sword I think.
That's it for now. The rest of the work (grip and final polish) will have to wait till next weekend or the weekend after that... gotta go to school. Stay tuned!!
|
|
   |
 |
Kai Lawson

|
 Posted: Mon 23 Jun, 2014 5:26 am Post subject: Posted: Mon 23 Jun, 2014 5:26 am Post subject: |
 |
|
That's lookin' really good man. Very clean--kudos!
"And they crossed swords."
--William Goldman, alias S. Morgenstern
|
|
  |
 |
|
Einar Drønnesund
|
 Posted: Mon 23 Jun, 2014 5:15 pm Post subject: Posted: Mon 23 Jun, 2014 5:15 pm Post subject: |
 |
|
Lukas, this is looking SO good.  Such an elegant looking weapon. Its gonna be a real treat to see it hilted and finished. Such an elegant looking weapon. Its gonna be a real treat to see it hilted and finished.
|
|
  |
 |
Leo Todeschini
Industry Professional

|
 Posted: Tue 24 Jun, 2014 12:53 am Post subject: Posted: Tue 24 Jun, 2014 12:53 am Post subject: |
 |
|
Hi Lukas,
That is really good work - very impressive and I like your 'can do attitude'. You will have a lovely sword that is all you.
As regards the cost of the weld Lukas wrote | Quote: | | Mig welder I think. Took it to a welding shop, I don't have one yet. I'm certainly not going there again, the guy made me pay 40 Euros for 15 min of work... I need to look out for a cheap one. Don't think Lidl has some here though. |
There are umpteen stories such as as ' man takes bent tool to a blacksmith, black smith says it will cost $10 to straighten it. Man says OK, smith hits the tool once, hands it back and says thats $10 please. Man complains and says how can you justify that? Smith says $1 for the hit and $9 for knowing where and how hard'
Looks to me like the man did a very clean and strong weld with his expensive welder in his expensive facility and his years of learning whilst you disturb him with a small job. 40 Euro well spent judging by the weld in my book. (I am not telling you off)
What I would say though is that your sword is looking damn good, as is your work and if you took this to some guy who messed the guard right up how would you feel now? If I were you I would take your next guard to him too; your work deserves it.
Tod
www.todsworkshop.com
www.todcutler.com
www.instagram.com/todsworkshop
https://www.facebook.com/TodsWorkshop
www.youtube.com/user/todsstuff1
|
|
   |
 |
|
Lukas MG
Industry Professional
|
 Posted: Tue 24 Jun, 2014 3:55 am Post subject: Posted: Tue 24 Jun, 2014 3:55 am Post subject: |
 |
|
Thanks Tod. Really appreciate it.
I get what yo are saying. I still feel that it was a bit too much money but I'll consider revoking my decision not to go to the guy. I however distinctly remember him not charging close to that much when he did a very similar guard 2 years ago so I have a bit of a hard time accepting it.
In any case, I hope to have my own welding kit when I next need something like this done.
|
|
   |
 |
Julien M

|
 Posted: Wed 25 Jun, 2014 1:34 am Post subject: Posted: Wed 25 Jun, 2014 1:34 am Post subject: |
 |
|
Great work all around Lukas - a slender and very elegant weapon for sure.
40 quids for a weld...I guess it is relative considering it allowed your project to move forward quickly.
I had my local garage fill a weld on the top of a hollow pommel for 5 euros, but it was easy enough. Your job is clean and was more complex. I understand Tod's rationale - but as said, I'd look out for cheap welder (lidl) to do this myself - that should be more than enough for jobs like these (can't try mine though as I don't have a suitable space to use it yet).
http://www.mig-welding.co.uk/forum/threads/pa...idl.33479/
Cheers,
J
|
|
  |
 |
|
|

