|
|
|
|
Call to Arms: The German Longsword
An article by Bill Grandy
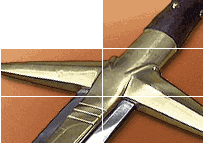
Not much is known about the 14th century fencing master Johannes Liechtenauer. We do know that he taught a martial art that he kept secret from all but his own students. In order to preserve his teachings, Liechtenauer composed a series of verses which in reality were a secret code for his students. As Liechtenauer's students went on to become masters themselves, the teachings spread and other masters in the Liechtenauer style put down their teachings on paper. Today we know of this martial art, often referred to as Kunst des Fechtens, or "The Art of Fighting," through their writings. Some of their manuals are reliant primarily on illustrations, such as those by Master Hans Talhoffer, and others primarily on text, including one in particular by a master named Sigmund Ringeck, who recorded his own commentaries on Liechtenauer's original verses so that others could decode the meaning. These manuals detail many forms of fighting such as fighting with the longsword (both in and out of armour), the messer (a single-edged sword similar in form to a falchion), sword and buckler, or the dagger, as well as unarmed combat and fighting from horseback. While not all of the German masters followed a straight lineage from Liechtenauer's teachings, the majority of surviving manuscripts at least reference him, and many masters who taught techniques that are different from Liechtenauer's direct tradition were still clearly influenced by Liechtenauer. We know that Kunst des Fechtens was practiced in the 14th and 15th centuries, and the 16th century German masters Jacob Sutor and Joachim Meyer produced manuals that show longsword fencing from the same lineage. Therefore we know that this style existed in at least three centuries. The manuals primarily focus on the judicial duel and personal combat, though they are complete systems, and it would seem logical that such techniques would also have been used in warfare. Parts of the Sword The longsword can take several forms, and each user may have different tastes in length and balance. A few things are clear from the period treatises, though: the ideal sword should be double-edged, should have a grip long enough for two hands and yet should also be maneuverable with one hand.  The blade itself is divided into two halves: the strong (starcke), which is the half closest to the hilt, and the weak (schwech), which is closest to the tip (many longsword practitioners use the modern fencing terms for the strong and weak—forte and foible). The strong of the blade is not physically stronger, but is named so because of the stronger leverage you have against another sword here, whereas the weak can be pushed aside easily. Despite this, the weak moves much faster than the strong, and your attacks should ideally be made with this faster-moving portion. The longsword's edges are also named. When you grip the sword, the edge closest to your second knuckles is the long edge. The edge closest to your forearm is the short edge (other martial art forms use the term true and false edge, respectively). While many would expect to mainly use the long edge, in Kunst des Fechtens it is quite common to use both edges in attacks. Basic Footwork The existing German fencing texts do not go into great detail about proper footwork, so in some cases a reasonable amount of extrapolation is necessary, sometimes drawing from similar martial art forms of the same time period. For the sake of this article, we will only get into the basics. Different stances will be used for different reasons, but you should start with your feet roughly shoulder-width apart. Take a step forward with one foot, which will point forward, and pivot the back foot so that it points out forty-five degrees or so (for now it does not matter which foot is forward, as this will change depending on circumstances). This will give you balance both forward and backwards as well as side-to-side. Bend the knees slightly, as this will allow you to move much more easily and fluidly (an important aspect often ignored by beginners). For now, keep your weight centered. Stand upright with your body relaxed. Relaxation is very important. Oftentimes beginners tense their shoulders when holding the sword, which results in choppy motions and slowed reactions. In fact, when first practicing footwork, do not hold the sword, as you will most likely become distracted by how you are holding it, which isn't important yet.
The next type of footwork is called the passing step, and is also simple. Start in the basic position described above, then pass the rear foot forward in front of the other. Finish in the basic stance, but with a new foot leading. This is a pass forward. To pass back, simply bring back the front foot. The passing step can be modified to step diagonally as well, and in fact this is usually how it will be performed to avoid being struck. For example, if you begin in a left foot forward guard, and your opponent cuts to your head, you can pass forward to the right to dodge the sword. In case of large steps, let the left foot trail behind and come back into your guard. Be sure to practice passing with both feet. Again, be sure to practice movement smoothly and fluidly, and finish your steps in a solid, balanced position. The Four Guards When gripping the hilt, place the dominant hand near the guard. The off-hand can hold the grip either near the pommel or can grip the pommel itself. It is obvious from the fencing manuals themselves that masters had different opinions on which grip was best. The Döbringer manuscript mentions that when fighting one should always hold the grip itself, not the pommel: And you will also strike harder and truer, with the pommel swinging itself and turning in the strike you will strike harder than if you were holding the pommel. When you pull the pommel in the strike you will not come as perfect or as strongly.
However, fighters in some fechtbuch illustrations are clearly seen gripping the pommel. Experiment with both grips and do whichever makes you feel more comfortable.The thumb of the dominant hand is often placed on the flat of the blade to provide control for many techniques. This may feel slightly odd at first, but you will get used to it, and certain cuts require it. When the thumb is on the blade, sometimes it must be flat against the sword. At other times it will naturally roll so that the side is pressed against the flat. There are other times where having the thumb against the blade is not necessary at all. For now, simply do what is most comfortable. Now that we have gripped the sword, there are four primary positions, or guards, in which to stand: the Plow guard (Pflug), the Ox guard (Ochs), the Roof guard (Vom Tag, literally "from the roof"), and the Fool's guard (Alber). A guard is essentially a defensive position that also allows you to launch your attacks. Always remain in a guarded position.
The Plow guard will defend the torso against attacks and allow you to make quick thrusts from below. When standing in the Plow on the right side, assuming you are right-handed, the long edge faces down, and on the left side it faces up. Reverse this for left-handers. The thumb will be on the side of the blade that is facing you.
Unlike the Ox or Plow, the Roof guard does not protect by intercepting an oncoming blade. Rather, the Roof guard protects by offense. Should an opponent blindly charge in, the Roof guard allows you to make a quick and powerful downward stroke. Your opponent most likely will see this and therefore will have to plan around this.
Attacking The Liechtenauer tradition speaks of the Three Wounders (Drei Wünder)—the strike, the thrust, and the slice—which are the three ways in which to attack an opponent. When to use each must be thoroughly understood. The Strike To strike is to make a hard cut with percussive momentum, unlike a slice (detailed below). This can also be referred to as a cut. Striking with the sword is not just a simple action of swinging the arms. A cut must be controlled and precise, because anytime you attack there is a moment of opportunity for your opponent to strike you. Therefore you must never attack wildly and must always recover into a guarded position. There are a few important things to keep in mind when cutting. The first is to make sure you are striking with the edge. This may seem obvious, but many beginners have a tendency to twist their sword mid-swing, resulting in a strike with the flat, or they will hit with the edge at an angle where the blade will not easily cut. As you begin the cut, you will always want to extend the arms first. Imagine that you are trying to reach out to strike your opponent, but do not lock the arms in doing this. You will be aiming to strike with the weak of your blade, as it is the faster portion, and therefore it will hit with the most power (despite its name, which is not referring to its use in the cut). When cutting, the dominant hand will guide the blade in its direction, but the major cutting power comes from the off hand, as it will create the leverage to get the tip moving faster. A simple drill to practice this mechanic is to grip the sword so that it points forward and slightly upwards. Take the off hand and pull up on the pommel. This will cause the tip to lower. When you cut, you will have to balance guiding the sword with a slight lifting of the pommel in order to get a proper cut.
It is important that you begin to move the sword before you step. If you begin to move your foot first, this is an opening your opponent will see. At the very least it gives the enemy time to defend; at the worst your opponent will strike you. By starting the motion with the sword you are moving the most offensive part of your action first, giving your opponent less time to react. Likewise, your opponent cannot attack without defending now, potentially giving you the advantage. For the moment, we will practice cutting with the long edge only as this tends to be the most natural motion. There are three main types of cuts: the over-cut (oberhau), the under-cut (unterhau) and the middle-cut (mittelhau). Each of these can be made from any guard, but for simplicity we will start out in the Roof guard at first with the left foot forward.
After you have practiced the over-cut, practice the under-cut up into the Ox guard. This cut is reminiscent of a golf swing to the casual observer, though the body mechanics are very different. Begin once again in the Roof guard with the left foot forward. As stated above, you should cut so that the sword finishes on the side of the back foot. We are going to cut from lower right to upper left, finishing in the left Ox guard, so that will require a passing step forward. As always, though, the sword must be in motion first.
Each of these cuts must be performed over and over and over again. They are very simple, yet if you do not have the sense of timing and movement down, you will easily be evaded and struck. A good swordsman has practiced these cuts thousands of times against the air alone, not counting against a still target or a practice partner. Be sure to start out slowly to get the basic mechanics right. Only after you have developed a strong feel for this should you speed up, otherwise you may be training your muscles to do the wrong things. As mentioned earlier, all three of these cuts can be performed from any guard, and they can also finish in any guard. A simple drill is to go through the three cuts as already described. Pick a cut, pick a guard in which to finish, and perform the cut. Then, from that guard, pick another cut and guard and continue. Occasionally start in a guard and make a cut that finishes in the same guard (for example, start in a left Ox guard and make an under-cut into a right Ox guard). Certain variations will make more sense to use than others, but the important thing for now is to understand the basic movement. The Thrust Thrusts will generally be performed in either the Plow or the Ox guards due to the fact that the tip is already pointed forward. To thrust with the sword, extend the sword's tip in a straight line to the target. If you need to close more distance, follow this with a step of the lead foot. As always, lead with the sword, and follow with the body and feet afterwards. Leading with the sword will also make it easier to aim. Recover into a guard after thrusting. As a general rule, if you are at the appropriate distance to strike with a cut from your guard, do so. However, should your sword be in a position in which the thrust can be made faster, do this instead. You also should thrust if your cut falls short of your opponent. If, for example, you cut down at your opponent, who steps back to avoid the cut, simply turn your cut into a thrust. The Slice The last of the Three Wounders—the slice—is something less than a full-power cut. The edge is placed against an exposed area of your opponent's body (primarily the hands), then pulled or pushed with force to cut. The slice can be used to good effect when there is no room to make a full cut. Imagine you are in the Fool's guard, and your opponent strikes down from above. He closes in very quickly, so you step to the side as you lift your edge into his unarmoured hands, slicing hard into them. This would cause enough of a wound that he would be unlikely to hold the sword any longer, allowing you to finish him. Defending Those who fence "to the touch" often forget that survival is the primary objective of a sword fight. It is one thing to strike your opponent without regard for your own safety, but quite another to defeat your opponent and be able to walk away unscathed. Merely standing in a guard is not an effective defense. Liechtenauer and all of the masters who followed in his tradition taught that the best way to keep your opponent from hitting you is to hit your opponent first. Therefore you should do your best to maintain the initiative and not simply wait around to react to an attack that may be unpredictable. However, if survival were only a matter of who strikes first, then there would be no need to learn fencing, as whoever is fastest and luckiest will always win. If your opponent takes the initiative you must do everything in your power to take it back. This concept is known as being in the vor (the "before" time) or the nach (the "after" time). If you are in the "after" timing, you must try to regain the "before" as soon as possible by defending and going back on the offense. Movement is the most important element of defense. Stepping out of the way of attacks, known as voiding, and immediately attacking from your new position is one of the more efficient means of defense. Unfortunately, voiding alone is not always effective, as quite often your opponent will change the angle of his attack to follow you. So, although, you should not feel that you must make blade contact with your opponent, you will often need to do so in order to set it aside as you void. Remember, you are fighting your opponent, not your opponent's sword. Do not strike the weapon without attacking the person as well. Liechtenauer clearly states: He who goes after the strike can rejoice little in his art.
Liechtenauer outlined five "secret" strikes to be used to set aside an opponent's sword, which later teachers referred to as "Master Strikes". These Master Strikes—the Strike of Wrath (Zornhau), the Cross Strike (Zwerchau), the Parting Strike (Scheitelhau), the Crooked Strike (Krumphau) and the Squinting Strike (Schielhau)—are the foundation of the finer techniques of longsword.As a note, the names used here are in English for the sake of clarity for the novice, but the English translations are not always accurate, or can be interpreted in different ways. Because of this, many, if not most, practitioners use the original terminology, and a serious student should at the very least be familiar with those terms. Defending the Torso: The Strike of Wrath The most natural cut for the average person will be to strike diagonally across the body, generally towards the torso of an opponent. This type of strike is actually the first of the five master strikes, the Zornhau, or the Strike of Wrath, and the most direct way to counter such an attack is to do the same strike against it. Imagine your opponent strikes at your torso: Your most important maneuver here is to get out of the way to avoid the attack. If you simply pedal backwards, your opponent may follow after you. You should instead step off to the side and forward. If your opponent strikes your left side, step to the right with your right foot. If your opponent strikes your right side, step to the left side with your left foot. Your sword will strike diagonally downwards towards the Plow guard, intercepting the oncoming attack. Make sure to use the strong of your blade to set aside your opponent's, as the weak of your blade will easily be pushed away.
Defending the Head: The Cross Strike The Zwerchau, or cross strike, can be used to defend against an over-cut because it finishes in the Ox guard. Liechtenauer writes, "the Zwerchau takes whatever comes from the roof," implying that strikes coming down from the roof guard are easily countered. To perform the cross strike, you will make a circular horizontal cut into the Ox guard with the hands above the head. Place your thumb against the bottom flat of the blade to control it. If you are right-handed, your strike from right to left will be done with the short edge, and the strike from left to right will be done with the long edge. The reverse is true for left-handers. If you are already in the Ox guard on one side and striking to the opposite side, you will draw a circle with the tip of the sword over your head as if making a large halo.
Defending the Legs: The Parting Strike So far we have used the Plow guard to defend against an attack to the torso, and we have used the Ox guard to defend against an attack to the head. It would seem logical, then, that to defend against a cut to the legs one would therefore use the Fool's guard, as it lies low. While this is not an impossible thing to do, it is not actually a very good defense, as follow-up attacks from this position will be too slow. The Schietelhau, or Parting Strike, offers a much more efficient way of defending the legs.
Voiding an Under-cut: The Crooked Strike The next Master Strike is the odd but aptly-named Krumphau, or Crooked Strike. This strike is crooked because it does not cut straight in front, but rather to the side. The motion of the cut is identical to the Cross Strike, except that rather than cutting with a circular motion above the head, the circular blade motion is performed in front of you, with the edges of the blade facing up and down. To perform the Crooked Strike, turn your blade so that the flat is facing you. If you are right-handed, the long edge cuts to the left, and the short edge to the right. Your thumb will be on the flat of the blade that is facing you. Cut to either side in a windshield-wiper motion. When you step with this cut, step slightly forward and away from the direction you are cutting: i.e. step forward and to the right when the sword is moving to the left, and vice versa.
Dealing with the Extended Blade: The Squinting Strike Your opponent may extend the arms and point the tip forward at your face so as to keep you at bay, or to provoke a reaction from you. This position is known as the langen ort, or long point, and is a common way to see what your opponent is going to do while keeping a safe distance. You cannot charge forward lest you run into the thrust, and if you strike at the blade, your opponent may simply move the tip around your sword while hitting you. Here we will use the Schielhau, or Squinting strike, to defeat this. The final strike is perhaps the strangest of the strikes, at least superficially. It is performed by striking downward with the short edge on the left side, finishing in either the Ox or the Plow guard, depending on the situation. It is not unlike the Cross strike and Crooked Strike in mechanics, making a circular motion with the tip downwards and at the side of the body. To strike, you will begin by making a move with your sword towards the weak of your opponent's blade, as if you are attempting to strike it. Quickly invert the blade so that the short edge is down and above the sword, and strike downwards against blade and your opponent. If your opponent were closer this would strike your opponent's shoulder, but since your opponent was standing with extended arms, your distance will not allow this. Instead, as the opponent's blade is cleared continue straight forward and thrust at the throat. Liechtenauer wrote it this way: "Squint to the point, and take the throat without fear."
Regaining the Advantage from the Bind: Winding Things don't always go as planned once blades make contact (blade contact is known as being at the bind). Imagine that your blade meets your opponent's and neither blade can set aside the other or continue forward. When this happens, you should not attempt to struggle and push against the blade as demonstrated in many fantasy movies. Rather, you must regain the advantage of the strong of your blade. Curl your arms up into the Ox guard with your strong against his weak (an action known as Winding or Winden), then thrust, or cut with the short edge if you find yourself too close to thrust.
Chaos can easily ensue once blades meet, and it is important to be able to feel your opponent's intentions through blade contact. This concept is known as fühlen (literally "feeling"). Your opponent can do one of two things at the bind: he can use strength to push through your sword, known as being hard at the sword, or he can relax his pressure, very likely to move around the sword to strike, known as being soft at the sword. It is important to immediately be able to feel which of these two actions your opponent is taking, then take the opposite action before your opponent has managed to take the initiative from you. If you are unable to fully displace your opponent's sword and decide to attack to the other side (being soft at the sword), your opponent could feel this and continue through with his original attack (being hard at the sword) and strike as you pull back your sword. Likewise, if you are hard at the sword and pushing it aside, your opponent could then go soft in order to move around and strike you someplace else.
Closing Distance: Going to Half-sword There are times when the length of a weapon can be more of a hindrance than a help. If your opponent gets in very close to you, it is too hard to effectively swing your blade. There are many ways of dealing with this problem, including striking with the pommel or moving to grapple, which relies on applying unarmed combat techniques to the sword. Another way to deal with closed distance is to shorten your sword—in effect, converting it to a short spear—by grabbing the blade with the off hand. Doing so is known as going to the half-sword (halbschwert). Half-swording was primarily used in armoured combat in order to guide and support the tip of the blade when thrusting into openings at the joints of armour, but sometimes it is necessary in unarmoured combat. Many would ask how one can grasp a blade without wounding the hand. First, make sure you grab the blade firmly so that the hand does not slide around. This will probably be the most important element in preventing a cut. The pressure of the hand should be on the flats, not the edges, which will also make a difference. In addition, when looking at the types of swords used in the masters of the Liechtenauer tradition, it would seem they are using tapered blades, such the Oakeshott Type XVa or Type XVII. Such blades, while sharp, had edge geometries that found a compromise between cutting and thrusting, and therefore the edge geometry is not as acute as would be on something such as a modern kitchen knife. In addition to all of this, medieval hands were probably rougher and more callused than most modern hands, which do not see as much manual labor. Wearing leather gloves is not a bad idea when practicing half-swording. Although most fight books show bare hands in use, there are occasional references to gloves. When grasping the blade, use the off-hand, holding the sword so that the thumb sides of the hands are facing each other, in the same way one would grasp a bar to lift weights. The dominant hand remains on the hilt where it can still maneuver the sword easily.
Disarming: Using the Half-sword Half-swording can also be used to disarm an opponent. In the previous scenario, you and your opponent are close as your blades meet, and if you pull back your opponent will hit you. Instead, you let go with your off hand to grasp the unmoving blades where they meet in the center. Make sure you grab the blades with your thumb on the bottom side. From here you will use leverage by pulling with the off hand and pushing with the dominant hand which is still at the hilt, as if turning a wheel. Hook your pommel underneath your opponent's arms as you turn this wheel, and as your opponent's arms become twisted and let go of the hilt, immediate pass back and threaten your opponent with the swords in the Ox guard.
Practice As with all martial arts, merely going through the motions a few times is not enough. Learning must be augmented with regular practice and study. The ideal situation is to find an instructor, though this unfortunately is not always a ready solution. The next best solution is to attend a workshop or travel to a class a few times so an instructor can show you firsthand how these techniques work. If neither option is available, you'll need to crack the books and study hard. Finding a practice partner will help. Finding a partner can simply meaning getting a friend or three to get together and practice, or it could require some searching. The internet has made such searches easier. You can also check local recreation centers or even community colleges, as sometimes there are local clubs looking for members. You'll never know until you check them out. Regardless of how you find your training partners, make certain that you are comfortable working with them, or at least comfortable with communicating with them if something bothers you. It is a sad fact that there are some individuals in this world who just want to hurt someone else, and under no circumstances should you feel obligated to work with such a person. Likewise, there are some people who are usually well-intentioned, but can sometimes let their ego get in the way of their judgment. If you feel that someone will not listen to you when you have safety concerns, then you need to find a new partner. Training and Safety Gear There is no set-in-stone way to practice Kunst des Fechtens, and defining your goals will ultimately determine your method of training. If you join a group, its members probably will already have established methodologies and safety gear requirements that you should follow. Training gear is not standard, and if you are training alone, or starting up your own group, you will have many options from which to choose. The first element most likely will be the sword, of course. The more accurate your training tool is, the greater your understanding of its use will be. However, you can learn the basics with a yardstick, and many beginners have gotten very creative in making cheap training swords (by modifying sports equipment such as lacrosse sticks, for example). Shinai, the bamboo swords used for Japanese fencing or Kendo, are a popular cheap alternative, as they are roughly the right size for a European longsword, and provide a degree of safety when speeding things up. Shinai, however, are lightweight, have no discernable edges and require modification to create a functional cross-guard.
Recently, many students of the sword have started using aluminum wasters. These swords allow the feel of metal on metal, and because aluminum is light, these wasters can have very thick cross-sections to allow for thick (and therefore safer) edges. Aluminum wasters tend to be lighter than typical steel longswords, and while the feel of metal on metal is more realistic than wood on wood, it should be noted that there is still a different feel. And although aluminum wasters may last longer than wooden wasters, they are slightly more expensive than commercially available wooden wasters, and cannot be used against non-aluminum training weapons. Blunted steel swords are probably what most practitioners will end up using in the long run, as these are the closest approximations to sharpened steel. As with other training tools, researching your options before you buy will save you trouble later. Some swords are very cheap for a good reason. Others provide a decent value for the price. It is quite possible that you will buy a sword only to find that later down the road you will want to invest in a nicer one. On the other hand, you may want to buy quality first and not have to worry about needing a replacement later. If you are only practicing the techniques slowly (and at the beginning, you absolutely should), you will need very little safety gear outside of caution and common sense. Once you start putting more speed and intent behind your strikes, you will probably desire more protection. Many practitioners wear standard sport fencing masks. A fencing mask will not protect against a full powered strike from a waster, nor do they protect the back of the head. For controlled drills, though, they not only will protect your head (the eyes in particular), but will allow your partner to be less self-conscious about accidentally not holding back enough on a face thrust or the like. The hands are often struck in practice, whether accidentally or on purpose, and some form of hand protection is a smart idea. The best solution is a pair of fitted, fully articulated plate gauntlets, though this is generally not economically feasible for most beginners. Simple leather gloves, particularly long cuffed ones, provide good defense against incidental scratches, and will resist burrs from metal swords or splinters from wooden ones. Many styles of padded gloves are available, from sport fencing gloves to lacrosse gloves, and you will have to experiment with the balance you want to strike between safety and mobility. If you intend to try unchoreographed free-play or bouting with your partner, you will need add some form of padding for the body as well as upgraded protection for your head and hands. Advanced Longsword Fencing While going into the specifics of how to free fence is a broad topic, and largely dependent on the people you bout with, there are a few things to keep in mind, safety above all. Don't rush to free-fence. Learn the techniques first, so that you are not just flailing around, playing "tag" with a sword. This will not only allow you to gain far more out of bouting, but also will ground you in safe sparring principles. Always remember that when you begin fencing, you are entering a bond of sacred trust. Don't betray your partner by being dangerous. Fencing is not realistic swordplay. Many unrealistic elements come into play, such as the fact that the swords do not actually cut into a person, the uncertainty of whether a cut would truly stop the fight or not, the safety factors, and even the psychological effect of being in a friendly bout versus a deadly encounter. Likewise, there are many tools for free-fencing, and all of them are unrealistic simulators. The only thing that handles like sharp steel is sharp steel, which is hardly a safe option for regular bouting. The best way to really study this art is to use multiple tools to gain a broad understanding of the different aspects of fighting. For instance, padded swords and shinai do not handle very realistically, but allow a greater speed of bouting that test reflexes and reaction under pressure. Wooden wasters have wide round edges, but are very stiff on the thrust, and all actions must be pulled. Steel swords must be pulled even more than wooden wasters, and while feeling the most realistic in binds and general actions, must still be used with great caution for the safety of your partner, an element that of course is nonexistent in the true form of the martial art. Fencing is merely one method of learning, and must be tempered with other methods. In addition to a waster or blunt steel sword, for example, you will also at some point want a sharp sword for test cutting. Test cutting is not necessary for a beginner, but in the long run it is important to understand exactly how the sword acts when cutting through a target. It will also test your edge alignment and form. Since different groups have different focuses, it is important when starting out that you define your own goals. Are you learning out of idle curiosity? Is this for fitness? Is this to compliment a related hobby such as stage combat or live action role-playing? Is this for reenactment? Do you desire to help rediscover a lost martial art? Defining your goals will help you decide exactly what route to pursue. Conclusion The art of the sword has a tradition routed deep in European history. For years, the western martial arts have been assumed to be brutish, at best, requiring little skill. A study of the period treatises, however, shows a diversity of styles and methodologies, and makes clear that the practitioners of these arts relied on strategy, technique and efficiency to overcome their opponents. To truly study the art, one must not only learn a few moves and counters, but must actually study the original treatises, because it is only through these treatises that one can really understand what the original masters of these arts intended. We modern practitioners will never see a real sword fight, and therefore it is vital to rely on the words of those who did see these fights, and whose lives depended on the skills laid down in the art forms. Studying their works is to revive their fighting spirit and martial intelligence, and gives the western martial arts new meaning for a modern world. About the Author Bill Grandy is an instructor of Historical European Swordsmanship and sport fencing at the Virginia Academy of Fencing. He has held a strong passion (obsession?) for swords and swordsmanship for as long as he can remember. He admits that this passion comes from a youth spent playing Dungeons and Dragons, but he'll only admit that if there are no girls around. Sources Hanko Döbringer translation from David Lindholm of the Association for Renaissance Martial Arts Sigmund Ringeck and Johannes Leichtenauer translations from Christian Tobler of the Order of the Selohaar. Translations and interpretations can be found in his books Secrets of German Medieval Swordsmanship (Chivalry Bookshelf, 2002) and Fighting with the German Longsword (Chivalry Bookshelf, 2004) Sigmund Ringeck translation also from David Linholm and Peter Svard of the Association for Renaissance Martial Arts. Translation and interpretations can be found in their book Sigmund Ringeck's Knightly Art of the Longsword (Paladin Press, 2003) Hans Talhoffer translation from Mark Rector. Translation can be found in his book Medieval Combat: A Fifteenth-Century Illustrated Manual of Swordfighting and Close-Quarter Combat (Greenhill Military Paperbacks, 2000) Codex Wallerstein translation by Grzegorz Zabinski with Bartlomiej Walczak. Translation can be found in their book Codex Wallerstein: A Medieval Fighting Book from the Fifteenth Century on the Longsword, Falchion, Dagger, and Wrestling (Paladin Press, 2002) Additional Notes Quotations from Johannes Liechtenauer taken from Christian Tobler's translation. Quotations from Hanko Döbringer taken from David Linholm's translation. Acknowledgements Historical illustrations are based on the originals from: Peter von Danzig's fechtbuch, 1452; Solthurner Fechtbuch; Codex Wallerstein; Hans Talhoffer; Paulus Hector Mair's Opus Amplissimum de Arte Athletica Original illustrations created by Nathan Robinson and are based on Bill Grandy's sketches Special thanks goes to David Rowe and Robert Busch who posed for the photographs that inspired Bill's sketches |
|


